2007-12-10

Convert BMP to ICO - Part 3

Below are 4 simple ways to convert a bmp to icon, using GdiplusX.

This sample uses 4 techniques, and creates 4 versions of icons from the same image file.
Before the conversion, it resizes the source image to the size of 16x16. That means that with this sample you can convert any image to ico file.


Important Requires VFP9 and GdiPlusX to run. 
https://github.com/VFPX/GDIPlusX

do locfile("system.app")

with _screen.system.drawing as xfcdrawing * convert the original bitmap to ensure better quality and compatibility
   loresized = .bitmap.new(.bitmap.fromfile(getpict()), 16,16)

* create icon object
    local loicon as xfcicon
    loicon = .icon.fromhandle(loresized.gethicon())

*** low quality icons

* save sending filename
    loicon.save("c:\icon_save_filename_lowqual.ico")

* save using stream
    local lostream as xfcmemorystream
    lostream = _screen.system.io.memorystream.new()

    loicon.save(lostream)
    strtofile(lostream.getbuffer(), "c:\icon_save_stream_lowqual.ico")


*** high quality icons
*** setting the tlquality flag to .t.

* save sending filename
    loicon.save("c:\icon_save_filename_highqual.ico", .t.)

* save using stream
    local lostream2 as xfcmemorystream
    lostream2 = _screen.system.io.memorystream.new()

    loicon.save(lostream2, .t.)
    strtofile(lostream2.getbuffer(), "c:\icon_save_stream_highqual.ico")

endwith
 

2007-11-24

How to create text as image file with GdiPlusX

Updated: fixed image size, thanks to christof wollenhaupt

 More than once I've seen people asking to create images containing some text. The sample below is really very simple.

  • creates a font
  • measures the space that the text will need
  • creates an image with the needed size
  • draws the string
  • saves to disk

Important Requires vfp9 and GdiplusX to run. 


DO LOCFILE("System.prg")

WITH _SCREEN.System.Drawing
   LOCAL lcText
   lcText = "GdiPlusX is Cool !!!"

   * Create a Font
   LOCAL loFont as xfcFont
   loFont = _screen.system.Drawing.Font.New("Verdana", 32, .FontStyle.BoldItalic)

   LOCAL loTmpBmp as xfcBitmap
   loTmpBmp = .Bitmap.New(1,1)

   * Retrieve the graphics object.
   LOCAL loTmpGfx AS xfcGraphics
   loTmpGfx = .Graphics.FromImage(loTmpBmp)

   * Measure the String
   * Get the size required for our text
   LOCAL loSize as xfcSize
   loSize = loTmpGfx.MeasureString(lcText, loFont)

   LOCAL loNewBmp as xfcBitmap
   loNewBmp = .Bitmap.New(loSize.Ceiling)

   LOCAL loNewGfx as xfcGraphics
   loNewGfx = .Graphics.FromImage(loNewBmp)

   * Clear the background to Yellow
   loNewGfx.Clear(.Color.Yellow)

   * Create a solid brush
   LOCAL loBrush as xfcSolidBrush
   loBrush = .SolidBrush.New(.Color.FromRGB(255,0,0)) && Red

   * Create an StringFormat object in order to draw the sting centered in the image
   LOCAL loStringFmt as xfcStringFormat
   loStringFmt = .StringFormat.New()
   loStringFmt.Alignment = .StringAlignment.Center

   * Create a Rectangle with the measures of the Bitmap
   LOCAL loRect as xfcRectangleF
   loRect = loNewBmp.GetBounds()

   * Draw the String
   loNewGfx.DrawString(lcText, loFont, loBrush, loRect, loStringFmt)

   * Finally save the image
   loNewBmp.Save("c:\MyText.Png", .Imaging.ImageFormat.Png)

   * Show the image
   RUN /N Explorer.exe c:\Mytext.Png
ENDWITH


2007-11-14

Convert your buttons to BMPs keeping transparency with GdiPlusX

Thee function below converts any button image to a bmp to be used in VFP forms.

There are lots of cool and free icons available on the web, but the vast majority are in .ico, gif or png image formats, that are not very familiar and reliable to be used in vfp. for us, the best image format, for a lot of reasons, is the BMP format.

Some transformations are needed to make this bmp to show exactly how we desire, specially when converting source images in a png, gif or ico formats.

VFP shows the pure white - RGB(255,255,255) as transparent in our buttons and image objects. the code below first converts the original whites to RGB(254,254,254) that is visually the same, but does not become transparent, and eliminates the need to create a mask image (.MSK) and next, converts the background color of the original bitmap to pure white, that will show transparent in VFP forms.

For more details, check these prior posts:
bmps with transparent backgrounds
how to put one image over another in a form


Important requires VFP9 and GdiplusX to run.

Save the program below as BUTTON2BMP.PRG, and call it this way:

BUTTON2BMP(GETPICT(), "c:\NewIcon.BMP")

When you compile this program in your executable, please don't forget to remove the LOCFILE() command, and just use a "do system.prg" instead


lparameters tcsourcefile, tcdestfile

do locfile("system.app")

local lobmp as xfcbitmap
local logfx as xfcgraphics
local loborderclr as xfccolor
local lorect as xfcrectangle
local loattr as xfcimageattributes
local locolormap as xfccolormap

with _screen.system.drawing
   locolormap = .imaging.colormap.new()
   loattr = .imaging.imageattributes.new()
lobmp = .bitmap.fromfile(tcsourcefile)
logfx = .graphics.fromimage(lobmp)
lorect = lobmp.getbounds() * get the top left pixel color, presuming this color is the background colro to become transparent * for our bmp case, this will become pure white - rgb(255,255,255) * that becomes transparent when used in vfp objects loborderclr = lobmp.getpixel(0,0) * convert original whites rgb(255,255,255) to off white - rgb(254,254,254) * this way, the whites will remain without the need of a mask locolormap.oldcolor = .color.white locolormap.newcolor = .color.fromargb(255,254,254,254) loattr.setremaptable(locolormap) logfx.drawimage(lobmp, lorect, lorect, .graphicsunit.pixel, loattr) * next step, convert the borders to pure white, rgb(255,255,255) that will become transparent in buttons locolormap.oldcolor = loborderclr locolormap.newcolor = .color.white loattr.setremaptable(locolormap) logfx.drawimage(lobmp, m.lorect, m.lorect, .graphicsunit.pixel, loattr) lobmp.save(tcdestfile, .imaging.imageformat.bmp) endwith

2007-11-12

Extract Icons from resources in a DLL with GdiPlusX

This week Calvin Hsia came with a very interesting post, Extract treeview or listview imagelist icons from a DLL .

That Calvin's post is dedicated to visual studio developers.

As in the comments there were some people asking the code for VFP, below is an adapted version for VFP users, using, of course, GdiplusX to help us extracting the icons from the resource.

There's still more to say about this, but in this first moment, I'm putting just the code to retrieve the embedded bitmap from the visual studio dll that calvin refers to. Below is the most relevant part of the original code in VB .net from Calvin, very easilly converted to VFP, using the GdiplusX library.


Picture 1: Relevant Source code in VB .NET


Important
Requires VFP9 and GdiplusX to run. 
https://github.com/VFPX/GDIPlusX

* Init GdiPlusX
DO LOCFILE("System.app")

#DEFINE load_library_as_image_resource 0x20
#DEFINE load_library_as_datafile 2

DECLARE INTEGER LoadLibraryEx IN kernel32;
   string lpfilename, INTEGER hmodule, INTEGER dwflags
DECLARE INTEGER LoadBitmap IN user32;
   INTEGER hmodule, INTEGER hresinfo
DECLARE INTEGER FreeLibrary IN kernel32 long hmodule
DECLARE INTEGER DeleteObject IN win32api INTEGER hobject

LOCAL lhmodule, lhres, lcResFile

* lcResFile = ADDBS(GETENV("ProgramFiles")) + ;
 "microsoft visual studio 9.0\common7\ide\msenv.dll"

lcResFile = ADDBS(GETENV("ProgramFiles")) + ;
 "microsoft visual studio 10.0\common7\ide\msenv.dll"
IF NOT FILE(lcResFile)
 lcResFile = GETFILE("dll")
ENDIF 

lhModule = LoadLibraryEx(lcResFile, ;
 0, load_library_as_image_resource + load_library_as_datafile)

lhRes = LoadBitmap(lhModule, 0x4f4)

IF lhRes > 0
 LOCAL loBmp AS xfcBitmap
 WITH _Screen.System.drawing
    loBmp = .Bitmap.FromhBitmap(lhres)
    loBmp.Save("c:\ResourceImage.bmp", .Imaging.ImageFormat.Bmp)
 ENDWITH
ELSE
 MESSAGEBOX("Could not load the file")
ENDIF


Picture 2: the extracted image in the original size


Picture 3: a part of the extracted image expanded 8 times


Cool ! but still not ready to be used in our VFP forms.

As that bitmap contains many icons in the same file, i'll use some gdi+ stuff to separate each of them, saving in a different file. we have to know the dimensions of each image, so i'll take the smallest value between the width and height, and use a loop to crop each icon image separately. the backgrounds also need to be treated, as i'll comment below.

For vs users, Calvin used a totally different technique to separate the images, using the listview and the treeview controls from VS. If someone could show me how to chieve this in vfp using his technique... It would be great !


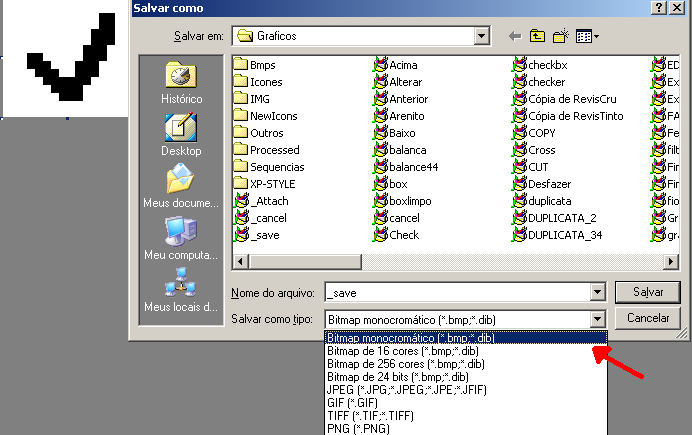
Each image is saved in two different formats:

1 - bmp of 24 bits, with white background, to be used in vfp buttons. the white background is rgb(255,255,255). for safety purposes, i also changed all original whites from the icons to rgb(254,254,254). this way, vfp will not make these parts of the images as transparent.

2 - png of 32bits, with the background color set as transparent

There is some more complex code that I used to crop the images. It's all full of comments, and I hope, it's easy to understand.

************************************************************************************************************* program: ExtractIconsFromResource2.prg
* author : Cesar Ch
*
* extracts all 16x16 icons stored in dlls
* extracts the icons from the big collection pictures obtained from the resource
* applies effects to the image to keep transparencies
*
* sample totally based on calvin hsia's article from his blog
* "extract treeview or listview imagelist icons from a dll"
* http://blogs.msdn.com/calvin_hsia/archive/2007/11/06/5948486.aspx?commentposted=true#commentmessage
*
* prerequisites:
* vfp9 and GdiplusX library
************************************************************************************************************

DO LOCFILE("system.app")

#DEFINE load_library_as_image_resource 0x20
#DEFINE load_library_as_datafile 2

DECLARE INTEGER loadlibraryex IN kernel32;
 STRING lpfilename,;
 INTEGER hfile,;
 INTEGER dwflags
DECLARE LONG freelibrary IN kernel32 LONG hmodule
DECLARE INTEGER loadbitmap IN user32;
 INTEGER hinstance,;
 INTEGER lpbitmapname
DECLARE INTEGER deleteobject IN win32api INTEGER hobject

WITH _SCREEN.SYSTEM.drawing
 LOCAL lcfile, lcshortname, lciconfile
 LOCAL hmodule, hres
 LOCAL N, lnwidth, lnheight
 LOCAL loicon AS xfcbitmap
 LOCAL lobmp AS xfcbitmap
 LOCAL loborderclr AS xfccolor

 * these objects will be used only if the output is bmp
 LOCAL locloned AS xfcbitmap
 LOCAL locolormap AS xfccolormap
 locolormap = .imaging.colormap.new()
 LOCAL loattr AS xfcimageattributes
 m.loattr = .imaging.imageattributes.new()

 lcfile = "c:\program files\microsoft visual studio 9.0\common7\ide\msenv.dll" + CHR(0)
 lcshortname = "c:\" + JUSTFNAME(lcfile)
 hmodule = loadlibraryex(lcfile, 0, load_library_as_image_resource + load_library_as_datafile)
 hres = loadbitmap(hmodule, 0x4f4)

 IF hres = 0
  LOOP
 ENDIF

 lobmp = .BITMAP.fromhbitmap(hres)
 lobmp.SAVE(lcshortname + "_allicons.png", .imaging.imageformat.png)
 deleteobject(hres)
 lnheight = lobmp.HEIGHT
 lnwidth = lnheight

 IF lnheight > 16 && this is a big image, so it's not the icon we're interested in
  LOOP
 ENDIF

 * get the quantity of bits per pixels of the image.
 * if we have an indexed format (< 24), we wont create the transparencies manually.
 LOCAL lnpixfmtsize
 lnpixfmtsize = lobmp.getpixelformatsize(lobmp.pixelformat)

 * get the top left pixel color, presuming this color will be converted
 * to transparent
 loborderclr = lobmp.getpixel(0,0)

 * make a copy of the bitmap for further processing as bmp
 locloned = lobmp.CLONE()


 *-* beginning of the png cropping
 * save the icons as pngs with transparent background
 IF lnpixfmtsize >= 24 && the background is not white, so
  lobmp.maketransparent(loborderclr)
 ENDIF

 FOR N = 0 TO (lobmp.WIDTH / lnwidth) - 1
  lciconfile = lcshortname + "_icon_" + TRANSFORM(N) + ".png"
  loicon = lobmp.CLONE(.rectangle.new(N * lnwidth, 0, lnwidth, lnheight))
  IF VARTYPE(loicon) = "o"
   loicon.SAVE(lciconfile, .imaging.imageformat.png)
  ENDIF
 ENDFOR

 * restore the original bitmap object for the bmp transformations
 lobmp = locloned.CLONE()
 *-* end of png cropping

 *-* beginning of the bmp cropping
 IF loborderclr <> .COLOR.white AND ;
   lnpixfmtsize >= 24 && the background is not white, so
  && let's make some changes to adapt the icon to have a white
  && background, that will appear transparent in buttons

  * convert original whites rgb(255,255,255) to off white - rgb(254,254,254)
  * this way, the whites will remain without the need of a mask
  locolormap.oldcolor = .COLOR.white
  locolormap.newcolor = .COLOR.fromargb(255,254,254,254)
  loattr.setremaptable(locolormap)
  logfx = .graphics.fromimage(lobmp)
  lorect = lobmp.getbounds()
  logfx.drawimage(lobmp, m.lorect, m.lorect, .graphicsunit.PIXEL, loattr)

  * next step, convert the borders to pure white, rgb(255,255,255) that will become transparent in buttons
  locolormap.oldcolor = loborderclr
  locolormap.newcolor = .COLOR.white
  loattr.setremaptable(locolormap)
  logfx.drawimage(lobmp, m.lorect, m.lorect, .graphicsunit.PIXEL, loattr)
 ENDIF

 * continue, cropping each icon from the big image
 FOR N = 0 TO (lobmp.WIDTH / lnwidth) - 1
  lciconfile = lcshortname + "_icon_" + TRANSFORM(N) + ".bmp"
  loicon = lobmp.CLONE(.rectangle.new(N * lnwidth, 0, lnwidth, lnheight), .imaging.pixelformat.format24bpprgb)
  IF VARTYPE(loicon) = "o"
   loicon.SAVE(lciconfile, .imaging.imageformat.bmp)
  ENDIF
 ENDFOR
 *-* end of the bmp cropping

 freelibrary(hmodule)
ENDWITH


Picture 4: thumbnails of some of the images cropped and transformed from the resource file


But there's still one important problem that I wasn't able to solve yet: to list all available resources. so, for the case i wanted to extract the biggest quantity of available icons in all resource files of my computer, the provisory solution i've found was to create a loop, from 0 (zero) to 65535, trying to retrieve the image resource.

I've just based myself in another old post of mine, extract icons from exe, dll and ico files with gdiplusx , and created a new script for extracting all available 16x16 icons in all resources from a specific folder, checking also all the subdirectories. the final result is tons of icons, all stored in just one folder, "c:\resource icons", in two versions, one in png with the transparent background, and another version stored in the format of bmp of 24 bits, with white background, that is the format best supported by vfp for our command buttons.

When you run this last sample, depending on the folder that you choose, and the remaining subfolders, the resulting process may be really long, so i ask you to be patient, but i ensure you it's worth. when finished, open the folder "c:\resource icons". my search in drive c of my computer, resulted in more than 25000 different icons !

Enjoy !

************************************************************************************************************
* PROGRAM: ExtractIconsFromResource3.Prg
* AUTHOR : Cesar Chalom
*
* Extracts all 16x16 icons stored in DLLs or EXE files
* Explores recursively in all the directory and subdirectories selected
* Extracts the icons from the big collection pictures obtained from the resource
*
* Sample totally based on Calvin Hsia's article from his blog
* "Extract TreeView or ListView ImageList icons from a DLL"
* http://blogs.msdn.com/calvin_hsia/archive/2007/11/06/5948486.aspx?CommentPosted=true#commentmessage
*
* Prerequisites:
* VFP9 and GdiPlusX library
************************************************************************************************************
 
DO LOCFILE("System.prg")

#DEFINE LOAD_LIBRARY_AS_IMAGE_RESOURCE 0X20
#DEFINE LOAD_LIBRARY_AS_DATAFILE 2

DECLARE INTEGER LoadLibraryEx IN kernel32;
   STRING lpFileName,;
   INTEGER hFile,;
   INTEGER dwFlags
DECLARE LONG FreeLibrary IN Kernel32 LONG hModule
DECLARE INTEGER LoadBitmap IN user32;
   INTEGER hInstance,;
   INTEGER lpBitmapName
DECLARE INTEGER DeleteObject IN WIN32API INTEGER hObject
 
* Create destination directory to receive the extracted icons
lcDir = "C:\ResourceIcons"
IF NOT DIRECTORY(lcDir)
   MKDIR (lcDir)
ENDIF
 
* Create the cursor that will store the valid file locations
CREATE CURSOR Recursive (cFile c(250))
LOCAL lcSelectedDir
lcSelectedDir = GETDIR()
IF EMPTY(lcSelectedDir)
   WAIT WINDOW "Invalid Directory"
   RETURN .F.
ENDIF
WAIT WINDOW "Retrieving folders information" NOWAIT

* Scan through the selected and the subfolders
=Recurse(lcSelectedDir)
 
WITH _SCREEN.SYSTEM.Drawing

LOCAL lcFile, lcShortName, lcIconFile, lnTotRec
LOCAL lnOldPercentage, lnPercentage
LOCAL hModule, hRes
LOCAL N, lnWidth, lnHeight
LOCAL loIcon AS xfcBitmap
LOCAL loBmp AS xfcBitmap
LOCAL loBorderClr AS xfcColor
 
* These objects will be used only if the output is BMP
LOCAL loCloned AS xfcBitmap
LOCAL loColorMap AS xfcColorMap
loColorMap = .Imaging.ColorMap.New()
LOCAL loAttr AS xfcImageAttributes
m.loAttr = .Imaging.ImageAttributes.New()
 
STORE 0 TO lnPercentage, lnOldPercentage
lnTotRec = RECCOUNT()

SCAN
   lcFile = ALLTRIM(Recursive.cFile) + CHR(0)
   lcShortName = JUSTFNAME(lcFile)
   hModule = LoadLibraryEx(lcFile, 0, LOAD_LIBRARY_AS_IMAGE_RESOURCE + LOAD_LIBRARY_AS_DATAFILE)
   FOR x = 0 TO 0xffff
      hRes = LoadBitmap(hModule, x) && 0x4f4)
      IF hRes = 0
         LOOP
      ENDIF
      lcNewFile = ADDBS(lcDir) + lcShortName
      loBmp = .BITMAP.FromHbitmap(hRes)
      loBmp.Save(lcNewFile + "_AllIcons_r" + TRANSFORM(x) + ".Png", .Imaging.ImageFormat.Png)
      DeleteObject(hRes)
      lnHeight = loBmp.HEIGHT
      lnWidth = lnHeight
      IF lnHeight > 16 && This is a big image, so it's not the icon we're interested in
         LOOP
      ENDIF
 
      * Get the quantity of Bits per Pixels of the image.
      * If we have an indexed format (< 24), we wont create the transparencies manually.
      LOCAL lnPixFmtSize
      lnPixFmtSize = loBmp.GetPixelFormatSize(loBmp.PixelFormat)

      * Get the top left pixel color, presuming this color will be converted
      * to transparent
      loBorderClr = loBmp.GetPixel(0,0)

      * Make a copy of the bitmap for further processing as BMP
      loCloned = loBmp.Clone()


      *-* BEGINNING OF THE PNG CROPPING
      * Save the Icons as PNGs with transparent background
      IF lnPixFmtSize >= 24 && The background is not White, so
         loBmp.MakeTransparent(loBorderClr)
      ENDIF

      FOR N = 0 TO (loBmp.WIDTH / lnWidth) - 1
          lcIconFile = lcNewFile + TRANSFORM(x) + "_Icon_" + TRANSFORM (N) + ".png"
          loIcon = loBmp.CLONE(.Rectangle.New(N * lnWidth, 0, lnWidth, lnHeight))
          IF VARTYPE(loIcon) = "O"
             loIcon.SAVE(lcIconFile, .Imaging.ImageFormat.Png)
          ENDIF
      ENDFOR
      * Restore the original Bitmap object for the BMP transformations
      loBmp = loCloned.Clone()
      *-* END OF PNG CROPPING


      *-* BEGINNING OF THE BMP CROPPING
      IF loBorderClr <> .Color.White AND ;
         lnPixFmtSize >= 24 && The background is not White, so
         && let's make some changes to adapt the icon to have a white
         && background, that will appear transparent in buttons
         * Convert original Whites RGB(255,255,255) to OFF WHITE - RGB(254,254,254)
         * this way, the whites will remain without the need of a mask
         loColorMap.OldColor = .Color.White
         loColorMap.NewColor = .Color.FromARGB(255,254,254,254)
         loAttr.SetRemapTable(loColorMap)
         loGfx = .Graphics.FromImage(loBmp)

         loRect = loBmp.GetBounds()
         loGfx.DrawImage(loBmp, m.loRect, m.loRect, .GraphicsUnit.Pixel, loAttr)

         * Next step, convert the borders to pure White, RGB(255,255,255) that will become transparent in buttons
         loColorMap.OldColor = loBorderClr
         loColorMap.NewColor = .Color.White
         loAttr.SetRemapTable(loColorMap)
         loGfx.DrawImage(loBmp, m.loRect, m.loRect, .GraphicsUnit.Pixel, loAttr)
      ENDIF


      * Continue, cropping each icon from the big image
      FOR N = 0 TO (loBmp.WIDTH / lnWidth) - 1
         lcIconFile = lcNewFile + TRANSFORM(x) + "_Icon_" + TRANSFORM(N) + ".bmp"
         loIcon = loBmp.CLONE(.Rectangle.New(N * lnWidth, 0, lnWidth, lnHeight), .Imaging.PixelFormat.Format24bppRGB)
         IF VARTYPE(loIcon) = "O"
            loIcon.SAVE(lcIconFile, .Imaging.ImageFormat.Bmp)
         ENDIF
      ENDFOR
      *-* END OF THE BMP CROPPING
 
   ENDFOR

   FreeLibrary(hModule)

   * Show progression
   lnRec = RECNO()
   lnPercentage = ROUND((lnRec / lnTotRec),2)
   IF lnPercentage > lnOldPercentage
      WAIT WINDOW "Extracting icons from files..." + CHR(13) + ;
         "Elapsed: " + TRANSFORM(lnPercentage * 100) + " %" NOWAIT
      lnOldPercentage = lnPercentage
   ENDIF
ENDSCAN
ENDWITH
RETURN
 
 
*****************************************************************************************
* FUNCTION : RECURSE
* AUTHOR : MICHAEL REYNOLDS
* DESCRIPTION : Good for performing file processing throughout an entire directory tree.
* The function, RECURSE(), is called with the full path of a directory.
* RECURSE() will then read all files and directories in the path.
* A function can be called to process files that it finds.
* Plus, the function calls itself to process any sub-directories.
* http://fox.wikis.com/wc.dll?Wiki~RecursiveDirectoryProcessing~VFP
*****************************************************************************************
FUNCTION Recurse(pcDir)
LOCAL lnPtr, lnFileCount, laFileList, lcDir, lcFile
CHDIR (pcDir)
DIMENSION laFileList[1]
*--- Read the chosen directory.
lnFileCount = ADIR(laFileList, '*.*', 'D')
FOR lnPtr = 1 TO lnFileCount

   IF 'D' $ laFileList[lnPtr, 5]
      *--- Get directory name.
      lcDir = laFileList[lnPtr, 1]
      *--- Ignore current and parent directory pointers.
      IF lcDir != '.' AND lcDir != '..'
         *--- Call this routine again.
         Recurse(lcDir)
      ENDIF
   ELSE
      *--- Get the file name.
      lcFile = LOWER(FULLPATH(laFileList[lnPtr, 1]))
      *--- Insert into cursor if .EXE, .ICO or .DLL
      IF INLIST(LOWER(JUSTEXT(lcFile)),"dll","exe")
         INSERT INTO Recursive (cFile) VALUES (lcFile)
      ENDIF
   ENDIF
ENDFOR
*--- Move back to parent directory.
CHDIR ..
ENDFUNC

2007-11-03

How to Extract frames from MultiPage TIFFs

Here's the link of a UTMAG article that covers the tiff subject deeply:
TIFFs and the new GdiplusX classes


At the topic "extracting frames from TIFFs" you'll find the code below, that saves the frames of a TIFF in separate image files:
** howto: extract frames from a multiframe tiff

do locfile("system,prg")

with _Screen.System.Drawing

* load the multiframe tiff to gdi+
local lomultif as xfcBitmap
loMultif = .Bitmap.New(GetPict("tif"))
local lnFrames, n, lcFrameFileName
lnFrames = loMultif.GetFrameCount()
if lnframes > 1
   for n = 0 to lnframes - 1
      lomultif.selectactiveframe(.imaging.framedimension.page, n)
      lcframefilename = "c:\frame" + transform(n + 1) + ".tif"
      lomultif.save(lcframefilename, .imaging.imageformat.bmp)
   endfor
else
   messagebox("the selected file is not a multiframe tiff")
endif

endwith
return

2007-10-31

Rotate texts in your reports for old VFP versions.

This post is for people that still did not upgrade to vfp9.

As ken murphy said in one of his latest posts in foxite forum: "... the capabilities of the vfp 9 report generator alone are worth the price of the upgrade. everything else is a bonus."


When I worked with VFP7  I created a function that uses GpImage2 GDI+ class, that you can download from this link. GPIMAGE2 CLASS


Have a look at the file "teste.frx" that is in the "examples" folder of the class. below is a screenshot with the possible results using the report designer


How to use:

After downloading the file, run teste.frx, it uses a simple class i've created called gdipstring, it's very easy to use. if you open gdipstring.prg, you'll see on the initial notes the parameters used.


Basically, you'll need to:

  • add an image object

  • dimenson the image to the desired size of the string you need

  • double click the image object, select "from file"


  • call the function gdipstring, as shown:
(GdipString( ;
    lcDimensionType, ; 
    lnWidth, ;
    lnHeight, ; 
    lcString, ; 
    lcFontName, ;
    lnFontSize, ; 
    lcFontStyle, ; 
    lcTextalignment, ;
    lnRotation))


Parameters:

tcDimensionType = character"p" ou "i" - dimensions in pixels or inches
tnWidth     = numeric, widthtnHeight    = numeric, height
tcString    = character, text string
tcFontName  = character, font name
tnFontSize  = numeric, font size
tcFontStyle = character, font style
           b - bold     i - italic     u - underline     s - 
tcTextAlignment = character, alignment
           c - center     l - left     r - right
tnRotation  = numeric, direction
           0 - normal (not recomended)
           1 - vertical - rotate 90º
           2 - horizontal - rotate 180º (upside down)
           3 - vertical - totate 270º


For example, if you put in from file : (gdipstring("p",190,31,"foxbrasil","arial",20,"ub","c",2)) you'll have : string "foxbrasil", arial, size 20, underline bold, centered, upside down drawn inside the virtual rectangle of size 190,31 in pixels.


Very important:

Don't forget to put the expression between parenthesis () !!

After running the report, you need to delete manually the temporary files used to create the gradients, with just one line of code:

delete file (addbs(getenv("temp")) + "tmp*.jpg")

Neither GpImage2 nor gdipstring are not under development anymore. i'm just sharing it, bacause maybe some people that still did not upgrade to vfp9 need some gdi+ usage. today, when i reopened the source code for GdipString, I found many things that can be enhanced. if you have interest in improving it, feel free to do so, and please send your updates so that other may benefit too.


About GpImage2:

The class GpImage2 brings a wrapper class to gdiplus.dll that allows to use most of the GDI+ functions. visit the link below, download the source, and run the samples available in the "examples" folder. there you'll find a simple class that permits to create some interesting charts, drawings, reports with vertical labels, etc.

https://vfpimaging.blogspot.com/p/gpimage2.html

If you're not using Windows XP or VFP8, you'll need to download the distributable version. There's a good explanation on GpImage's website.

Here you'll find some other samples, at the "FAQs" page.

https://vfpimaging.blogspot.com/p/gpimage2-faqs.html

2007-10-30

How to put one image over another in a form

This is a very basic and easy stuff.

The image that will stay on the top must have some kind of transparency set. It is recommended that you use a BMP of 24bits. VFP will automatically convert the white parts of the image into transparent, like in the picture below, if you set the "BackStyle" property of the image object to 0 - Transparent. don't forget to set the picture to "Bring to front" in the "layout" toolbar.


The 1st form shows the 2 images separated, but with opaque backgrounds. Then, in the 2nd, I set the background to transparent, then dropped a part of the image for you to see how it is done. You can get more information in this post too:

Bmps with transparent backgrounds http://vfpimaging.blogspot.com/2007/10/bmps-with-transparent-backgrounds_881.html

Another good way is to use PNGs, that support alpha (transparencies), but the most recomended, and best supported by VFP is the use of BMPs, as shown.


Update - Oct 30, 2007

Bernard Bout remembers that "also note that all white areas of an image will become transparent. for instance in the second image in cesars post the form background is visible through the eye of the brazilian man. if this is not what you want then you must "mask" out the white parts of the bitmap that you want to be not transparent.
Just open the image and paint the white areas you want to keep black. The image should be the same size. paint all the other parts white and save it as a bmp but with a .msk extension. VFP will automatically use this file to "mask" out the white areas from being transparent."


For this case, I usually edit the image, and change the pure RGB "whites" - rgb(255,255,255) that I want to keep to another close white, such as RGB(254,254,254) nobody will notice the difference and it works very nice, with the advantage of not needing to create an extra image file.

Anyway, if you still prefer to create a mask, choose to create a 1bpp monochrome image format. Usually people save in "24bits" mode. but as msk pictures are only B&W, monochrome will bring the possibility to have the smallest image file size. Comparing to a monochrome image, the 24bpp image will be 24 times bigger in size.

In MSPAINT, for instance, choose, in "SaveAs..."


Other important notes about MSK files:

In VFP HELP for pictureval:

"You cannot specify a mask (msk) file with the pictureval property. If you are using BMP images and want a mask, you should use the picture property instead. you can also use a different image format such as gif which has transparency defined within the image."

how to: enhance control display a very nice explanation about msk files

2007-10-29

MY THANK YOU TO PABLO ROCA and PortalFox Sysops

recently i've known some bad news for the spanish speaking community. pablo roca is not a mvp anymore - see his article not renewed as mvp - but still alive! .


i've never had any direct contact with him. not in emails, neither in a forum, never. but i'm very thankful to him and all portalfox sysops and contributors.


for those who don't know, portalfox is the main and free portal for spanish-speaking developers, located at http://www.portalfox.com. they do an amazing job, providing great and inventive contents, and translate everything that they find could help spanush speaking vfp users, such as the vfp ide, vfp help files, articles, codes, etc. even for brazilians, due to some similarities in the language, many of us constantly visit portalfox.


all that i can say is a big thank you to you, pablo roca (spain), and also to isaac venegas (usa), esparta palma (mexico), luis maria guayan (argentina), ana bisbe (spain) and all your collaborators.


long life to portalfox !

2007-10-24

BMPs with Transparent Backgrounds

Here are some notes on bmp transparencies on vfp, based in some conclusions I took after some discussions in Foxite, specially the ones with Bernard Bout.

BMP image files, when used in the picture property of the image control usually show whites - RGB(255,255,255) as transparent. VFP creates a temporary mask for our pictures in order to show this way.


Picture 1: BMPs can have whites converted to transparent when using the "Picture" property and Backstyle set to "Transparent".

But this works only for the 'Picture' property, not for 'PictureVal' !

The code below creates a simple image on the fly, and saves it to disk. The image on the left uses the picture property, and the right one uses 'PictureVal'.


ImportantRequires VFP9 and GdiplusX library to run.
https://github.com/VFPX/GDIPlusX


PUBLIC oForm
oform = NEWOBJECT("form1")
oform.SHOW
RETURN

DEFINE CLASS form1 AS FORM
 TOP = 13
 LEFT = 17
 HEIGHT = 168
 WIDTH = 314
 DOCREATE = .T.
 CAPTION = "testing pictureval rendering"
 NAME = "form1"

 ADD OBJECT image1 AS IMAGE WITH ;
  BACKSTYLE = 0, ;
  HEIGHT = 120, ;
  LEFT = 24, ;
  TOP = 24, ;
  WIDTH = 120, ;
  NAME = "image1"

 ADD OBJECT image2 AS IMAGE WITH ;
  BACKSTYLE = 0, ;
  HEIGHT = 120, ;
  LEFT = 168, ;
  TOP = 24, ;
  WIDTH = 120, ;
  NAME = "image2"

 PROCEDURE INIT
  DO LOCFILE("system.app")
  LOCAL lobmp AS xfcbitmap
  LOCAL logfx AS xfcgraphics
  WITH _SCREEN.SYSTEM.drawing
   lobmp = .BITMAP.new(60, 60, 0, .imaging.pixelformat.format24bpprgb)
   logfx = .graphics.fromimage(lobmp)
   logfx.CLEAR(.COLOR.white)
   logfx.drawrectangle(.PEN.new(.COLOR.red, 3), 10,10,40,40)
   lobmp.SAVE("c:\tempbmp.bmp", .imaging.imageformat.bmp)
  ENDWITH
  THISFORM.image1.PICTURE = "c:\tempbmp.bmp"
  THISFORM.image2.PICTUREVAL = FILETOSTR("c:\tempbmp.bmp")
 ENDPROC
 ENDDEFINE


Picture 2: BMPs show whites as transparent only when using the "picture" property. When using "Pictureval", images are shown without a transparent mask.

The image from the left uses the picture property, and the right one uses the pictureval property in the most simple aproach: FILETOSTRING("c:\MyPicture.bmp")
That shows us that unfortunately we can't obtain transparencies in BMPs using the pictureval property.

Fortunately, in VFP9 SP2 the VFP team fixed the PNG rendering problem, and we can use PNGs with our VFP image objects. But in this case, we need to set manually the alpha channel, specifying which color (or colors) will become transparent.
With GdiplusX these things become really easy. Just one line will do the trick:

This.oBmp.MakeTransparent(.Color.White)

Replace the above code's Init() procedure with the one below, that just changes the rendering to PNG, and uses the "MakeTransparent" method of the xfcBitmap GdiplusX library:

PROCEDURE INIT
 DO LOCFILE("system.app")
 LOCAL lobmp AS xfcbitmap
 LOCAL logfx AS xfcgraphics
 WITH _SCREEN.SYSTEM.drawing
  lobmp = .BITMAP.new(60, 60) && the default is 32bppargb
  logfx = .graphics.fromimage(lobmp)
  logfx.CLEAR(.COLOR.white)
  logfx.drawrectangle(.PEN.new(.COLOR.red, 3), 10,10,40,40)
  lobmp.maketransparent(.COLOR.white)
  lobmp.SAVE("c:\temppng.png", .imaging.imageformat.png)
 ENDWITH
 THISFORM.image1.PICTURE = "c:\temppng.png"
 THISFORM.image2.PICTUREVAL = FILETOSTR("c:\temppng.png")
ENDPROC


Picture 3: PNGs allow the use of the alpha channel, so transparencies are available both for picture and pictureval properties


Is that enough ?

Still not enough for Bernard - part 1

As he said in one foxite thread: "VFP does have a problem refreshing png's of any reasonable size. they do "flash". the best format to use with vfp is the bmp." - totally true - humpf ! That's very easy to reproduce, create any form, put an image object inside of it, using any png image. then, add another image, but this time use a BMP. set the anchor properties, run the form, and resize it, to understand what happens. maybe for the vast majority of people this is acceptable, but with BMPs we still can have a good result.


Still not enough for Bernard - part 2

He noticed that the bmps originated from the samples that I've been providing using GDI+ could not have their whites to become transparent when used in the image control.

!#*$¨*&¨($%+)(*#$%&(_*%¨#)&*(¨#&*()yuioh%&*_#(*&%(_*#$¨

The truth is that he had reported this last year, when i created a sample for his awesome One Note tabs - "vfp-x gdi+ code samples for "recreating one note tabs in vfp9" from bernard"

He has just brought this subject again in a recent foxite thread, and i finally took the time to make some new tests, and found the problem.

In most cases, when I created my bitmaps from scratch, I used the xfcBitmap.create() method, just like this:

local loBmp as xfcBitmap
loBmp = .Bitmap.New(lnWidth, lnHeight)

This by default created a bitmap with the dimensions lnwidth x lnheight, with 32bppargb pixelformat. that means that for each pixel of the bitmap we would be using 32bits, or 4 bytes - for red, green, blue and alpha (transparency).
but bmps don't support transparencies !
So, the alpha byte is totally useless for the bmp case, making our file to become 25% bigger...
The major problem is that vfp does not transform whites from 32bppargb bitmaps into transparent !!!
So, when creating a bitmap that will be saved in the bmp image format, never use 32bppargb. use 24bpprgb instead ! and this definitely solves our problem, and bernard will be able to continue to develop his masterpieces of design, hopefully, using gdiplusx.
Instead of :
loBmp = .Bitmap.New(lnWidth, lnHeight)

use:
loBmp = .Bitmap.New(60, 60, 0, .Imaging.PixelFormat.Format24BppRgb)

Thanks Bernard ! This was a good lesson to me, I've learned some good things in this investigation. Very nice, since this brings some new possibilities for some new controls.
The GdiplusX 'ImageCanvas' control will also receive some modifications, allowing to render in file mode, saving to TMP files, but using 24bpprgb, to allow the transparencies. Another modification that we agreed is to add a PNG render mode, since pngs allow the use of the alpha channel.
'Vfppaint' was also updated, allowing users to choose between 24bpprgb (new default value) and 32BppArgb.

New Report features from SP2 are ready to use !

since ms released the final service pack 2 for vfp last week, many complaints have arised. people are not trusting in this new version, and it seems that some problems that were fixed in sp1 came back in sp2.


fortunately, the report new features are really solid, trustable, and bring good value for us.


so, for this moment, it is safe to bring the report features to sp1, if you are having problems with sp2, till ms delivers a new version.


colin has just answered to koen piller in ut on this subject.


koen said: "it is very well possible to safe the 3 report*.app from sp2 than install vfp + sp1 and replace the 3 report*.app with the ones from sp2. this configuration will give you all the advantages of the new report enhancements without using all the other sp2 'improvements'."

and colin gives his final words, recommending to update the ffc classes as well: "remember to update the ffc classes as well, if you use them in your programs. you don't have to use reportoutput.app at all if you don't want to. the listener classes in _reportlisteners.vcx are good to go..."


2007-08-30

New Foxes on the block


(reuters) - two big-eared foxes are pictured in the zoo of krefeld august 30, 2007. three big-eared foxes were born on may 9, 2007 in the zoo of krefeld. reuters/ina fassbender (germany)


ps: still waiting for alex feldstein's pictures of foxes !


link received from leandro tassinari

2007-08-23

Great news for VFPX

bo durban has just posted the latest release of the gdiplusx library.


the most important part of the library has been converted to prg. there are several advantages using prg based classes, such as: enhanced speed and reduced size. here you can find more info about these changes. bo has given more details in his blog and in the codeplex messageboard.


now gdiplusx is beta ! the new 1.00b version can be downloaded from here


visit vfpx site on codeplex to see all great projects for vfp 


from now on, you must change your instantiation of gdiplusx call from:


addproperty(_screen, "system", newobject("xfcsystem","system.vcx"))
or
_screen.addproperty("system", newobject("xfcsystem","system.vcx"))

to:

do ("system.prg")


btw, i'll try to update all my blog posts with this small change in the class initialization.


today i was really surprised when i read kevin ragsdale's latest blog post, about an eweek's post about the 25 most active projects at codeplex.


there we are ! 14th position !


check it by yourself: http://www.eweek.com/slideshow/0,1206,pg=0&s=25947&a=213883,00.asp


apart from these, there are some really great new projects to come...


have you already seen this video from kevin ragsdale ?


vfpx is a community effort to create open source add-ons for visual foxpro 9.0. sign up, sign in, and get involved today!!!