2006-06-22

Gradient Backgrounds in your forms with GDI+ Part2

In my previous post with the same title, I showed how to create vertical gradient backgrounds in forms. as commented by Malcolm Greene, that same technique can be used to VFP containers.

According to MSDN, "the lineargradientbrush class defines a brush that paints a color gradient in which the color changes evenly from the starting boundary line of the linear gradient brush to the ending boundary line of the linear gradient brush. the boundary lines of a linear gradient brush are two parallel straight lines. The color gradient is perpendicular to the boundary lines of the linear gradient brush, changing gradually across the stroke from the starting boundary line to the ending boundary line. The color gradient has one color at the starting boundary line and another color at the ending boundary line."

The main parameters to be passed to the LinearGradientBrush are:

  • point1 - starting point of the gradient. the starting boundary line passes through the starting point.
  • point2 - ending point of the gradient. the ending boundary line passes through the ending point.
  • color1 - ARGB color at the starting boundary line of this linear gradient brush.
  • color2 - ARGB color at the ending boundary line of this linear gradient brush.

In that case, I created a one pixel wide image, with the form height. then I created a linear gradientbrush, using coordinate (0,0) as point1, coordinate (0,thisform.height) as point2. Color1 was the ARGB of any selected color, and color2 was white(RGB(255,255,255)). Inside this narrow image, I have drawn a rectangle using the lineargradientbrush, and saved in bmp format. VFP's image object was responsible to "stretch" this narrow image to fit the width of the form. That technique permitted to have a small image file.


Gdi+ provides horizontal, vertical, and diagonal linear gradients too ! So, using the same techniques, we can easily create other cool effects. 

horizontal gradients

For horizontal, we need to pass as point1 and point2 two coordinates with the same "y". It is fundamental that the two points have the same second coordinate (y) to make the line connecting them horizontal.


diagonal gradients

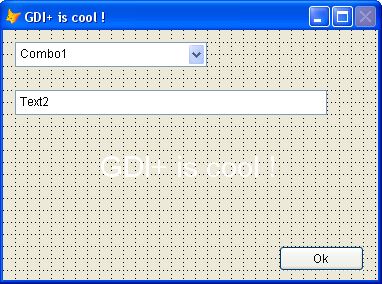
For diagonal gradients, the two coordinates must create a diagonal line, like point (0,0) and point (50,50). This will create a diagonal line between those two points, starting from the top-left till the bottom-right edge of the form, like in the form below:


If we change the coordinates to coordinates (0,50) and (50,0), the diagonal line will end in the top edge of the form:


So, in our case, I just did this modification in the original code from the previous post:

LOCAL lnGradMode, lnGradPixels, lnHeight, lnWidth
m.lnGradPixels = 100 && width of the gradient line
m.lnGradMode = 4 && ranges from 1 to 4
DO CASE
    CASE m.lnGradMode = 1 && vertical
        x1 = 0
        y1 = 0
        x2 = 1
        y2 = m.lnGradPixels
    CASE m.lnGradMode = 2 && horizontal
        x1 = 0
        y1 = 0
        x2 = m.lnGradPixels
        y2 = 1
    CASE m.lnGradMode = 3 && diagonal topleft –> bottomright
        x1 = 0
        y1 = 0
        x2 = m.lnGradPixels
        y2 = m.lnGradPixels
    CASE m.lnGradMode = 4 && diagonal bottomleft –> topright
        x1 = 0
        y1 = m.lnGradPixels
        x2 = m.lnGradPixels
        y2 = 0
ENDCASE

m.lnWidth = IIF(m.lnGradMode = 1, 1, m.lnGradPixels)
m.lnHeight = IIF(m.lnGradMode = 2, 1, m.lnGradPixels)

The lineargradientbrush will be created using the coordinates (x1,y1) and (x2,y2). The image will have the size lnwidth, lnheight. The variable lngradpixels means the size in pixels of the image to be created. In the previous post, i used "thisform.height". After some tests, I've seen that using 60 pixels will create a good quality gradient to be expanded by the image object to fit the whole form.

So, create any form, and add the following codes to load and destroy events. change the value of the variable lngradmode to any value between 1 and 4, to see the form drawn with 4 types of gradients. also change lnGradPixels to 5, 20, and 60. don't forget to resize the form.


load event

* LOAD EVENT
LOCAL lcGradFile, lnGradMode, lnGradPixels, x1, y1, x2, y2, lnWidth, lnHeight
m.lcGradFile = ADDBS(SYS(2023)) + SYS(2015) + ".bmp"
THIS.ADDPROPERTY("cTempGradFile", m.lcGradFile)

m.lnGradPixels = 60
m.lnGradMode = 4
DO CASE
    CASE m.lnGradMode = 1 && vertical
        m.x1 = 0
        m.y1 = 0
        m.x2 = 1
        m.y2 = m.lnGradPixels

    CASE m.lnGradMode = 2 && horizontal
        m.x1 = 0
        m.y1 = 0
        m.x2 = m.lnGradPixels
        m.y2 = 1

    CASE m.lnGradMode = 3 && diagonal topleft –> bottomright
        m.x1 = 0
        m.y1 = 0
        m.x2 = m.lnGradPixels
        m.y2 = m.lnGradPixels

    CASE m.lnGradMode = 4 && diagonal bottomleft –> topright
        m.x1 = 0
        m.y1 = m.lnGradPixels
        m.x2 = m.lnGradPixels
        m.y2 = 0

ENDCASE

m.lnWidth = IIF(m.lnGradMode = 1, 1, m.lnGradPixels)
m.lnHeight = IIF(m.lnGradMode = 2, 1, m.lnGradPixels)

IF FILE(m.lcGradFile)
    CLEAR RESOURCES (m.lcGradFile)
ENDIF

LOCAL lnRgbColor1
m.lnRgbColor1 = RGB(0,128,255) && blue

* create gradient image 
SET CLASSLIB TO HOME() + "ffc/_gdiplus.vcx" ADDITIVE

* create a colorobject and store argb color values to variables 
LOCAL loClr AS gpColor OF HOME() + "ffc/_gdiplus.vcx"
LOCAL lnColor1, lnColor2
m.loClr = CREATEOBJECT("gpcolor")
m.loClr.FoxRgb = m.lnRgbColor1
m.lnColor1 = m.loClr.argb
m.loClr.FoxRgb = RGB(255,255,255) && white
m.lnColor2 = m.loClr.argb

* create a bitmap 
LOCAL loBmp AS gpBitmap OF HOME() + "ffc/_gdiplus.vcx"
m.loBmp = CREATEOBJECT("gpbitmap")
m.loBmp.CREATE(m.lnWidth, m.lnHeight)

* get a bitmab graphics object 
LOCAL loGfx AS gpGraphics OF HOME() + "ffc/_gdiplus.vcx"
m.loGfx = CREATEOBJECT("gpgraphics")
m.loGfx.CreateFromImage(m.loBmp)

* declare api 
DECLARE LONG gdipcreatelinebrushi IN GDIPLUS.DLL ;
    STRING point1, STRING point2, ;
    LONG color1, LONG color2, ;
    LONG wrapmode, LONG @linegradient

* get a gradient brush 
LOCAL loBrush AS gpBrush OF HOME() + "ffc/_gdiplus.vcx"
LOCAL hBrush && brush handle
m.hBrush = 0
= gdipCreateLinebrushI(BINTOC(m.x1,"4rs") + BINTOC(m.y1,"4rs"), ;
      BINTOC(m.x2,"4rs") + BINTOC(m.y2,"4rs"), ;
      m.lnColor1, m.lnColor2, 0, @m.hBrush)
m.loBrush = CREATEOBJECT("gpbrush")
m.loBrush.sethandle(m.hBrush, .T.)

* fill the bitmap with our gradient 
m.loGfx.FillRectangle(m.loBrush,0,0,m.lnWidth, m.lnHeight)
m.loBmp.SaveToFile(m.lcGradFile,"image/bmp")

THISFORM.ADDOBJECT("imgbackground","image")
WITH THISFORM.imgbackground
    .STRETCH = 2 && stretch
    .WIDTH = THISFORM.WIDTH
    .HEIGHT = THISFORM.HEIGHT
    .ANCHOR = 15 && resize width and height

    .PICTURE = m.lcGradFile
    * .pictureval = filetostr(lcgradfile) 
    * .pictureval = loadpicture(lcgradfile) 
    * erase (lcgradfile)

    .ZORDER(1)
    .VISIBLE = .T.
ENDWITH

RETURN


destroy event

*DESTROY EVENT
WITH THISFORM
    IF FILE(.cTempGradFile)
        CLEAR RESOURCES (.cTempGradFile)
        ERASE (.cTempGradFile)
    ENDIF
ENDWITH

A slight modification was the addiction of the zorder(1), to make sure the image object added is the first one, and staying in the back of all objects of the form. Thanks Aílsom !

Thanks to Malcolm Greene, the codes from resize event were removed, and substituted with .anchor = 15 && resize width and height. VFP9 brought so many cool features, and I must admit that i've tested just a few of them till this moment.

Malcolm also suggested sending the binaries from the image created to the pictureval property of the image object. I don't know why, but in some machines the picture appeared rotated in a 90 degree. Also, in Windows NT, the white part of the gradient was replaced with transparency. So, for this moment, I'm keeping the codes at the destroy event to make sure the image created is deleted from the disk.

I'm sure that there is a good solution for that, maybe someone can explain that to me ?


New Gdi+ classes

Craig and Bo added to the new library apart from all the GDI+ functions, some other classes, that will make the use of GDI+ really easy and, most important, very intuitive. There will be no more need to make direct API calls to Gdi+, manage object handles. The creation of images will become really intuitive.

One of the main addictions is the imagecanvas class. That's a subclass of the image native class, that was created to receive the drawn image. the advantage to use this class is that it renders graphics super fast (according to Bo and Craig about up to 30 times faster than saving an image to disk and loading to an image object). There will be no disk access, once all the image is manipulated directly from the memory. The user will have only to put the codes to draw the image in the "BeforeDraw" method of the object and that's all.

In the case of gradient backgrounds of forms, we will have just to add the "imagecanvas" object, and in the beforedraw method of this object put this code. only 5 lines!!! Thanks to Craig Boyd for sending this sample to me.


beforedraw event

* Using GdiPlusX and the ImageCanvas
* Place this code at the "BeforeDraw" event of the ImageCanvas class
LOCAL loBrush AS xfcLinearGradientBrush
WITH _SCREEN.SYSTEM.Drawing
    m.loBrush = .Drawing2d.LinearGradientBrush.New(THIS.Rectangle,;
          .COLOR.FromRgb(0,128,255), .COLOR.White,;
          .Drawing2d.LinearGradientMode.ForwardDiagonal)
    THIS.oGfx.FillRectangle(m.loBrush, THIS.Rectangle)
ENDWITH


How do you fill using these classes ?

There are many more cool effects to create with lineargradientbrushes. By default, the color in a linear gradient changes uniformly. However, it is possible to customize a linear gradient so that the color changes in a non-uniform fashion, creating gradients using more than two colors.

From now on, I'll try to show these features using the new classes. I must confess that I don't feel smart to code in the way that I just presented in this post when I can replace more than 70 lines of code with 5 !

In the attached file I'm sending 2 forms. The first, gradient.scx creates a simple form, with codes in load and destroy events. Try also the form gradient2.scx, that will permit you to customize the gradient colors and directions on the fly.


2006-06-16

GDIPLUS FOR ALL VFP VERSIONS

As we all know, gdiplus.dll brings many new possibilities to vfp users.
Gdiplus.dll is a free and redistributable library provided by microsoft, that must be used only in windows (R) systems.

Alexander Golovlev may have been the first person to publish a class that dealed with this fantastic library. He created the class GPIMAGE.PRG, that was published in 2003 in the UniversalThread / LevelExtreme downloads area.

https://www.levelextreme.com/Home/ShowHeader?Activator=17&ID=18584

GpImage came a long time before VFP9, and is supposed to work with VFP7 and above. Probably works with previous versions, but i've not tested. It's a great library, providing a wrapper class to deal with Gdi+. The original class works with the image class, and has most functions that the gpimage class from _GdiPlus.vcx (from the VFP9 FFC) brings, and some other really interesting, providing windows captures, cropping images and some other cool functions.

Under the authorization of Alexander Golovlev, and with his help and support, I added some functions to the original GpImage class published in UT.

Basically we included a graphics class.
New methods included let you draw rectangles, lines, ellipsis, pies, strings and pictures on images. brings the possibility to control alignment, size, orientation, rotation, of any shape, text or picture.
It is possible to work with image attributes too, changing colors of images, like convert to B&W or gray scale, increase a color, etc.

This class is based on GDI+ and requires gdiplus.dll which is freely available and can be installed on win98 and higher. If you have not installed WinXP or .NET runtime then you can download this dll from
http://www.microsoft.com/downloads/details.aspx?familyid=6a63ab9c-df12-4d41-933c-be590feaa05a&displaylang=en

The link for the enhanced class gpimage that deals with gdiplus.dll is :
http://vfpimaging.blogspot.com/p/gpimage2.html

There you can find also a FAQS link, with many samples using the class.
Download, open the examples folder, where you can find many small prgs and forms dealing with the class.

There is a cool example of a form that changes contrast, saturation, brightness (testgpimage.scx), another usage of a pie charts class (objpie.prg), and also printing vertical or upside down texts in vfp reports (see testefrx.prg and teste.frx).

The class is more recommended for people that still have not upgraded to VFP9 and need to use GDI+. It's a long time since I don't send an update to this class.
There are many other new features that can be added to the library, like getting metadata information, gradient color brushes, etc.

Recently, I've been using my free time to develop using the new _Gdiplus.vcx class and the fantastic new VFPX classes - aka GDIPLUSX.
http://vfpimaging.blogspot.com/p/gpimage2.html

2006-06-13

Gradient Backgrounds in your forms with GDI+

After reading this post, read also: Gradient backgrounds in your forms with gdi+ part 2


Gdi+ brings us the possibility to create many cool effects such as gradient colors. This feature was not included in _gdiplus.vcx, but can also be accessed easily with a simple call to the flat API. A great part of the codes below that are related to the creation of the gradient brush is from Bo Durban.

To apply this to forms is really easy. add the codes below to the load, resize and destroy events of any form:


load event

LOCAL lcGradFile
m.lcGradFile = ADDBS(SYS(2023)) + SYS(2015) + ".bmp"
THIS.ADDPROPERTY("cTempGradFile", m.lcGradFile)

IF FILE(m.lcGradFile)
    CLEAR RESOURCES (m.lcGradFile)
ENDIF

LOCAL lnRgbColor1
m.lnRgbColor1 = RGB(60,30,180) && blue

* create gradient image 
SET CLASSLIB TO HOME() + "ffc/_gdiplus.vcx" ADDITIVE

* declare API 
DECLARE LONG gdipCreateLinebrushI IN GDIPLUS.DLL ;
    STRING point1, STRING point2, ;
    LONG color1, LONG color2, ;
    LONG wrapmode, LONG @linegradient

* create a colorobject and store argb color values to variables 
LOCAL loClr AS gpColor OF HOME() + "ffc/_gdiplus.vcx"
LOCAL lnColor1, lnColor2
m.loClr = CREATEOBJECT("gpcolor")
m.loClr.FoxRgb = m.lnRgbColor1
m.lnColor1 = m.loClr.ARGB
m.loClr.FoxRgb = RGB(255,255,255) && white
m.lnColor2 = m.loClr.ARGB

* create a bitmap 
LOCAL loBmp AS gpBitmap OF HOME() + "ffc/_gdiplus.vcx"
m.loBmp = CREATEOBJECT("gpbitmap")
m.loBmp.CREATE(1,THISFORM.HEIGHT)

* get a bitmap graphics object 
LOCAL loGfx AS gpGraphics OF HOME() + "ffc/_gdiplus.vcx"
m.loGfx = CREATEOBJECT("gpgraphics")
m.loGfx.CreateFromImage(m.loBmp)

* get a gradient brush 
LOCAL loBrush AS gpBrush OF HOME() + "ffc/_gdiplus.vcx"
LOCAL hBrush && brush handle
m.hBrush = 0
gdipCreateLinebrushI(BINTOC(0,"4rs") + BINTOC(0,"4rs"), ;
      BINTOC(0,"4rs") + BINTOC(THISFORM.HEIGHT,"4rs"), ;
      m.lnColor1, m.lnColor2, 0, @m.hBrush)
m.loBrush = CREATEOBJECT("gpbrush")
m.loBrush.sethandle(m.hBrush, .T.)

* fill the bitmap with our gradient 
m.loGfx.FillRectangle(m.loBrush,0,0,1,THISFORM.HEIGHT)
m.loBmp.SaveToFile(m.lcGradFile,"image/bmp")

THISFORM.ADDOBJECT("imgbackground","image")
WITH THISFORM.imgbackground
    .STRETCH = 2
    .WIDTH = THISFORM.WIDTH
    .HEIGHT = THISFORM.HEIGHT
    .PICTURE = m.lcGradFile
    .VISIBLE = .T.
ENDWITH
RETURN


resize event

Thisform.imgbackground.Width = Thisform.Width 
Thisform.imgbackground.Height = Thisform.Height


destroy event

WITH THISFORM
    IF FILE(.cTempGradFile)
        CLEAR RESOURCES (.cTempGradFile)
        ERASE (.cTempGradFile)
    ENDIF
ENDWITH


New GDI+ classes

The code I presented in the Load event works pretty fine, but sounds really ugly, when comparing to what we are able to do with GdiPlusX

The code below will replace all codes related to the creation of the gradient color in the load event.

* create a GDI+ linear gradient image using GdiPlusX
DO LOCFILE("system.app")

LOCAL loBmp AS xfcBitmap
LOCAL loGfx AS xfcGraphics
LOCAL loBrush AS xfcBrush
WITH _SCREEN.SYSTEM.Drawing
    m.loBmp = .BITMAP.New(1, THISFORM.HEIGHT)
    m.loGfx = .Graphics.FromImage(m.loBmp)
    m.loBrush = .Drawing2d.LinearGradientBrush.New( ;
          .Rectangle.New(0, 0, 1, THISFORM.HEIGHT), ;
          .COLOR.FromRgb(lnRgbColor1), .COLOR.White, 1)
    m.loGfx.FillRectangle(m.loBrush, m.loBrush.Rectangle)
    m.loBmp.SAVE(lcGradFile, .Imaging.ImageFormat.bmp)
ENDWITH


Related post: Gradient backgrounds in your VFP forms with GDI+ Part 2

2006-06-10

Use encoder parameters to save your images with GDI+

The method savetofile from GpImage class in _GdiPlus.vcx from vfp9 FFC “saves the image object to a disk file, using specified encoder or image format and optional parameters.”

Here are the most important:


quality (supported by jpeg)

Specifies the compression level when you save a jpeg image. a quality level of 0 corresponds to the greatest compression, and a quality level of 100 corresponds to the least compression.

Sample 1: Saves image with quality of 70%

LOCAL lcSource
m.lcSource = GETPICT()
LOCAL loImage AS gpImage OF HOME() + ffc / _GdiPlus.vcx
m.loImage = NEWOBJECT("gpimage", HOME() + "ffc/_gdiplus.vcx")
m.loImage.CreateFromFile(m.lcSource)
m.loImage.SaveToFile("c:\myimage.jpg","image/jpeg", "quality=70")


transformation (supported by jpeg)

Gdi+ provides the following transformations that can be performed on jpeg images without loss of information:

         rotate 90 degrees
         rotate 180 degrees
         rotate 270 degrees
         flip horizontally
         flip vertically
 

Each of those listed above corresponds to a gdiplus constant, that needs to be passed together with the “transformation” encoder.

The transformation will proceed without loss of information if the file used to construct the image object is a jpeg file and the width and height of the image are both multiples of 16. if the width and height of the image are not both multiples of 16, gdi+ will do its best to preserve the image quality when you apply one of the rotation or flipping transformations.

Sample 2: saves image with quality of 50% and rotate 180 degrees

#DEFINE EncoderValueTransformRotate90       13
#DEFINE EncoderValueTransformRotate180      14
#DEFINE EncoderValueTransformRotate270      15
#DEFINE EncoderValueTransformFlipHorizontal 16
#DEFINE EncoderValueTransformFlipVertical   17

LOCAL lcSource
m.lcSource = GETPICT()
LOCAL loImage AS gpImage OF HOME() + ffc / _GdiPlus.vcx
m.loImage = NEWOBJECT("gpimage", HOME() + "ffc/_gdiplus.vcx")
m.loImage.CreateFromFile(m.lcSource)
m.loImage.SaveToFile("c:\myimage.jpg","image/jpeg", ;
      "quality=50, transformation=14")

This makes rotating and flipping a very simple and quick operation!

For TIFF images, these are the commonest parameters:


saveflag (supported by tiff)

         See my article at UTMAG from may 2006: “Multiframe images with GDI+Multiframe images with GDI+
         https://www.levelextreme.com/Home/ShowHeader?Activator=23&ID=39285
         used for the creation and manipulation of multiframed images.


compression (supported by TIFF)

#DEFINE EncoderValueCompressionLzw    2
#DEFINE EncoderValueCompressionCcitt3 3
#DEFINE EncoderValueCompressionCcitt4 4
#DEFINE EncoderValueCompressionRle    5
#DEFINE EncoderValueCompressionNone   6
 

colordepth (supported by tiff)
         color depth in bytes per pixel.


These are defined by gdi+ but not supported by any of the standard encoders: 'compression', 'scanmethod', 'version' and 'rendermethod'.

Source: msdn

See also:
Rotate / flip images with VFP9 and GDI+