2006-11-27

FUNCTION TO CONVERT COLORS

The short function below converts any color to its darker or brighter version, just as the original colorpicker slidebar.

parameters:

      rgb - original rgb value to convert

      tnlevel - ranges from -100 to + 100. zero means no changes; +100 = white; -100 = black; positive values will return brighter images, while negative will bring darker.


lparameters tnRgb, tnLevel

if tnLevel = 0
   return tnrgb
endif


tnLevel = tnLevel / 100

local lnRed, lnGreen, lnBlue
lnRed   = bitand(tnRgb, 0x000000ff)
lnGreen = bitrshift(bitand(tnRgb, 0x0000ff00), 8 )
lnBlue  = bitrshift(bitand(tnRgb, 0x00ff0000), 16)


if tnLevel > 0
   return rgb( ;
      lnRed   + ((255 - lnRed)   * tnLevel) , ;
      lnGreen + ((255 - lnGreen) * tnLevel) , ;
      lnBlue  + ((255 - lnBlue)  * tnLevel) )
else
   return rgb( ;
      lnRed   + (lnRed   * tnLevel) , ;
      lnGreen + (lnGreen * tnLevel) , ;
      lnBlue  + (lnBlue  * tnLevel) )
endif


To better understand how it works, you can download the attached file, that contains a simple example. Click on "select color" to pick a color then play with the spinner to see the darker and brighter resulting colors.


2006-11-23

Updated version of the My namespace

Doug Hennig very kindly published a new version of the my namespace on the White papers and source code page of the stonefield web site.

It's a 240 k download. This version contains some fixes, a small project and a simple form showing how to use some functions.

In my tests, I installed "MY" with no errors. It works fine even without having a previous version installed, and does not need the sedna ctp to run, just vfp9. Intellisense worked perfectly, showing only the properties and methods of interest, and inside a form. The help file is nice, and contains good documentation about the more than 60 functions included.

As always, another great job from Doug.

2006-09-18

HOWTO: CHANGE BITMAP RESOLUTION

The bitmap resolution can be also very easily changed with gdi+.

The sample below uses the new GdiPlus-X classes from VFPX projects that can be downloaded from here: http://www.codeplex.com/wiki/view.aspx?projectname=vfpx&title=gdiplusx

*!* HOW TO CHNGE THE BITMAP RESOLUTION
* the code loads an image, changes its resolution to 200x200
* and saves it again as a bmp
*
http://msdn2.microsoft.com/en-us/library/system.drawing.bitmap.setresolution.aspx

do locfile("System.app")

with _screen.system.drawing
   * load image to gdi+
   local loBmp as xfcBitmap
   loBmp = .Bitmap.New(getpict())

   * change Bitmap Resolution
   loBmp.SetResolution(200,200)

   * save the bitmap
   loBmp.Save("c:\newresolution.bmp", .imaging.imageformat.bmp)

endwith
return

2006-09-17

Using TIFFs with the new GDI+ classes - UPDATE

As a continuation of my article from may 2006 published in UTMAG, entitled "Multiframe images with Gdi+" i wrote a New article published in the september 2006 issue of utmag called "Using TIFFs with the New Gdi+ classes" showing how to manipulate TIFF images using the New gdiplus-x library from VFP-X project. It also shows how to create TIFFs using all Compressions supported.

But I left one point not very clear. This came to me after I saw a question from Jennifer Slusher in the universal thread forums (thread id #1153672), asking how to create multiPage TIFFs in Compression 4 (ccitt4). in that article, I showed how to create common Multiframe TIFFs and also how to create a single frame TIFF using Compression, but forgot to show or comment about creating Multiframe TIFFs with Compression.

Multiframe TIFFs with Compression

Gdi+ by default uses the 'lzw lossless' Compression whenever asked to save as TIFF. According to Wayne Fulton, from www.scantips.com, "lossless means there is no quality loss due to Compression. lossless guarantees that you can always read back exactly what you thought you saved, bit-for-bit identical, without data corruption". so, unless we specify, gdi+ will always use lzw Compression on TIFFs.

To create a Multiframe TIFF with Compression different from lzw, we need to send some additional Encoder Parameters to gdi+, even if the original picture is already a TIFF with another Compression. The methods "save" and "saveadd" permit us to send more than one Encoder Parameter at a time. Then, all we need to do is to create another Encoder object based on the guid for the Compression Parameter category, and set its EncoderValue to the desired Compression, eg Compressionccitt4.

The sample below will ask for any three images. To ensure that it will be able to save using Compression ccitt4, it will first convert all the selected images to monochrome. Then it will create a Multiframe TIFF image file containing all selected images in the Compression ccitt4.


** The following example loads three Bitmap objects
** converts all Bitmaps to monochrome to be compatible with rle, ccitt3/4 Compression
** the code saves all three images in a single, multiple-frame TIFF
** file, using Compression format CCITT4 
DO LOCFILE("System.app")

WITH _SCREEN.SYSTEM.Drawing
    LOCAL loBmp AS xfcBitmap
    LOCAL loMultif AS xfcBitmap
    LOCAL loPage2 AS xfcBitmap
    LOCAL loPage3 AS xfcBitmap
    LOCAL myEncoder AS xfcEncoder
    LOCAL myCompEncoder AS xfcEncoder
    LOCAL myEncoderParameter AS xfcEncoderParameter
    LOCAL myCompEncoderParameter AS xfcEncoderParameter
    LOCAL myEncoderParameters AS xfcEncoderParameters

    *!* create three Bitmap objects.
    *!* 1st we load the original Bitmap,
    *!* and then get its monochrome version
    m.loBmp    = .BITMAP.New(GETPICT())
    m.loMultif = m.loBmp.getMonochrome()
    m.loBmp    = .BITMAP.New(GETPICT())
    m.loPage2  = m.loBmp.getMonochrome()
    m.loBmp    = .BITMAP.New(GETPICT())
    m.loPage3  = m.loBmp.getMonochrome()

    *!* release the original Bitmap because we'll not use it any more
    m.loBmp = NULL

    *!* create Encoder object based on the guid for the saveflag Parameter category.
    m.myEncoder = .Imaging.Encoder.saveflag

    *!* create Encoder object based on the guid for the Compression Parameter category.
    m.mycompEncoder = .Imaging.Encoder.Compression

    && create an EncoderParameters object.
    && EncoderParameters object has an array of EncoderParameter objects
    && in this case, there'll be 2 EncoderParameter objects in the array.
    m.myEncoderParameters = .Imaging.EncoderParameters.New(2)

    *!* save the first Page (frame).
    m.myEncoderParameter = .Imaging.EncoderParameter.New(m.myEncoder, ;
          .Imaging.EncoderValue.Multiframe)
    m.mycompEncoderParameter = .Imaging.EncoderParameter.New(m.mycompEncoder, ;
          .Imaging.EncoderValue.Compressionccitt4)

    m.myEncoderParameters.PARAM[1] = m.myEncoderParameter
    m.myEncoderParameters.PARAM[2] = m.mycompEncoderParameter
    m.loMultif.SAVE("c:\NewMultiframeCompress.tif", ;
          .Imaging.imageformat.TIFF, m.myEncoderParameters)

    *!* save the second Page (frame).
    *!* this time we will only change the 1st Parameter to "framedimensionPage"
    *!* the 2nd Parameter that sets the Compression will remain the same
    m.myEncoderParameter = .Imaging.EncoderParameter.New(m.myEncoder, ;
          .Imaging.EncoderValue.framedimensionPage)
    m.myEncoderParameters.PARAM[1] = m.myEncoderParameter
    m.loMultif.saveadd(m.loPage2, m.myEncoderParameters)

    *!* save the third Page (frame).
    *!* this time we don't need to make any change to the Encoder paramenters
    *!* we'll keep using the same Parameters used when we added the 2nd frame
    m.loMultif.saveadd(m.loPage3, m.myEncoderParameters)

    *!* close the multiple-frame file.
    *!* this time we call the "flush" Parameter to close the file.
    *!* we don't need the 2nd Parameter any more, so change it to null
    m.myEncoderParameter = .Imaging.EncoderParameter.New(m.myEncoder, ;
          .Imaging.EncoderValue.FLUSH)
    m.myEncoderParameters.PARAM[1] = m.myEncoderParameter
    m.myEncoderParameters.PARAM[2] = NULL
    m.loMultif.saveadd(m.myEncoderParameters)
ENDWITH
RETURN


Notice that the object myEncoderParameters contains a property "params" that is an array of Parameters.


Other related links:
TIFF, tag image file format
A few scanning tips


2006-09-12

Helper code to create image on the fly for "Using the Alpha Channel in Visual Foxpro Images" from Bernard Bout

Here's another very simple code that attends Bernard Bout, creating an image on the fly, based on his post entitled "Using the alpha channel in visual foxpro images". Again in this sample, I'm using the new Gdiplus-X classes from VFPX project that can be downloaded from GitHub


* Helper code to create image on the fly for
* Bernard Bout "Using the alpha channel in VFP images"
* http://weblogs.foxite.com/bernardbout/archive/2006/09/11/2436.aspx
*    image dimensions 300 x 270 pixels
*    make all image totally transparent
*    draw a light yellow - rgb(254,254,228) rectangle
*         centered in the main image.
*    save as PNG, to preserve the transparencies
DO LOCFILE("System.app")

WITH _SCREEN.SYSTEM.Drawing
    * create an empty bitmap
    LOCAL loBitmap AS xfcBitmap
    m.loBitmap = .BITMAP.New(300,270)

    * initialize the graphics object
    LOCAL loGfx AS xfcGraphics
    m.loGfx = .Graphics.FromImage(m.loBitmap)

    * make all image transparent
    m.loGfx.CLEAR(.COLOR.FromARGB(0,0,0,0))

    * draw the yellow rectangle
    m.loGfx.FillRectangle(.SolidBrush.New(.COLOR.FromRGB(254,254,228)), 10,9,278,249)

    * save as png to keep transparencies
    m.loBitmap.SAVE("c:\bernardboutagain.png", .Imaging.ImageFormat.Png)
ENDWITH
RETURN


2006-08-13

VFP-X GDI+ code samples for "Recreating One Note Tabs in VFP9" from Bernard

2007-oct-23 - Updated, based on "BMPs with transparent backgrounds"

Now Bernard Bout is owing me 2 blog posts :-))
Below are some pictures from Bernard Bout, showing some very cool forms that he created. To ease his job, I'll show how to create on the fly the image files that he uses to create these examples, using the new classes from the gdiplus-x project, available for download at codeplex.

More information can be obtained in Bernard's blog post:"Recreating One Note Tabs in VFP9"


sample 1: on_bigtab

target image enlarged 8 times :


target image in original size :


** creates an image on_bigtab.png to be used in the "one note tabs"
** example from Bernard bout
** - a 112x20 pixel image, with an irregular polygon with a blue
** border and filled with a gradient orange color

do locfile("system.app")


* define the colors to be used
local lnrgbstartgradclr, lnrgbendgradclr
lnrgbstartgradclr = rgb(253,233,218) && light orange
lnrgbendgradclr = rgb(247,182,131) && orange
lnrgbborderclr = rgb(59,97,156) && dark blue


with _screen.system.drawing
local lobitmap as xfcbitmap
local logfx as xfcgraphics
local logradbrush as xfclineargradientbrush
local lopen as xfcpen
local lorect as xfcrectangle


* create a new 112x20 bitmap in the default pixelformat - 32bppargb
lobitmap = .bitmap.new(112,20, 0, .imaging.pixelformat.format24bpprgb)


* create a graphics object to be able to draw in the bitmap
logfx = .graphics.fromimage(lobitmap)
logfx.clear(.color.white) && white


* create a rectangle for the linear gradient brush
lorect = .rectangle.new(0,0,112,19) && size of bitmap

* create a linear gradient brush
logradbrush = .drawing2d.lineargradientbrush.new(lorect,;
.color.fromrgb(lnrgbstartgradclr), .color.fromrgb(lnrgbendgradclr),1)


dimension lapoints(6)
lapoints(1) = .point.new(0,20)
lapoints(2) = .point.new(17,4)
lapoints(3) = .point.new(21,2)
lapoints(4) = .point.new(109,2)
lapoints(5) = .point.new(110,4)
lapoints(6) = .point.new(110,20)


* fill the polygon with gradient brush
logfx.fillpolygon(logradbrush, @lapoints)

* create a blue pen object to draw border
lopen = .pen.new(.color.fromrgb(lnrgbborderclr),1)


* draws the blue border
lapoints(1) = .point.new(0,19)
lapoints(2) = .point.new(17,2)
lapoints(3) = .point.new(22,0)
lapoints(4) = .point.new(109,0)
lapoints(5) = .point.new(111,2)
lapoints(6) = .point.new(111,18)


logfx.drawlines(lopen, @lapoints)

* draw bottom-right pixels
lobitmap.setpixel(111,19,.color.fromrgb(lnrgbendgradclr))
lobitmap.setpixel(110,19,.color.fromrgb(lnrgbendgradclr))


* save the image
lobitmap.save("c:\on_bigtab.png", .imaging.imageformat.png)
endwith


sample 2: on_smalltab

target image enlarged 8 times :


target image in original size :


** creates an image on_smalltab.png to be used in the "one note tabs"
** example from Bernard bout
** - a 16x8 pixel image, with an irregular polygon with a blue border
** and filled with a gradient orange color


do locfile("system.app")


* define the colors to be used
local lnrgbstartgradclr, lnrgbendgradclr
lnrgbstartgradclr = rgb(255,232,197)
&& light orange
lnrgbendgradclr = rgb(255,179,15)
&& orange
lnrgbborderclr = rgb(26,57,86) && dark blue


with _screen.system.drawing
local lobitmap as xfcbitmap
local logfx as xfcgraphics
local logradbrush as xfclineargradientbrush
local lopen as xfcpen
local lorect as xfcrectangle


* create a new 16x8 bitmap in the default pixelformat - 32bppargb
lobitmap = .bitmap.new(16,8,0, .imaging.pixelformat.format24bpprgb)


* create a graphics object to be able to draw in the bitmap
logfx = .graphics.fromimage(lobitmap)
logfx.clear(.color.fromrgb(rgb(255,255,255))) && white


* create a rectangle for the linear gradient brush
lorect = .rectangle.new(0,0,16,8) && size of bitmap

* create a linear gradient brush
logradbrush = .drawing2d.lineargradientbrush.new(lorect,;
.color.fromrgb(lnrgbstartgradclr), .color.fromrgb(lnrgbendgradclr),1)


dimension lapoints(5)
lapoints(1) = .point.new(0,7)
lapoints(2) = .point.new(0,2)
lapoints(3) = .point.new(2,0)
lapoints(4) = .point.new(8,0)
lapoints(5) = .point.new(15,7)


* fill the polygon with gradient brush
logfx.fillpolygon(logradbrush, @lapoints)


* create a blue pen object to draw border
lopen = .pen.new(.color.fromrgb(lnrgbborderclr),1)


* draws the polygon
logfx.drawpolygon(lopen, @lapoints)


* save the image
lobitmap.save("c:\on_smalltab.png", .imaging.imageformat.png)
endwith


sample 3: on_smallbutton

original image enlarged 8 times: target image enlarged 8 times :


original image in normal size: target image in original size :


** loads an image and draws a customized rectangle using a
** lineargradientbrush; creates image file on_smallbutton.png
** to be used in the "one note tabs" example from Bernard bout
** - a 112x20 pixel image, with an irregular polygon with a blue
** border and filled with a gradient orange color

do locfile("system.app")


* define the colors to be used
local lnrgbstartgradclr, lnrgbendgradclr
lnrgbstartgradclr = rgb(253,232,197) && light orange
lnrgbendgradclr = rgb(255,179,15) && orange


with _screen.system.drawing
local lobitmap as xfcbitmap
local logfx as xfcgraphics
local logradbrush as xfclineargradientbrush
local lorect as xfcrectangle


* load the image file
lobitmap = .image.fromfile(getpict())


* create a graphics object to be able to draw in the bitmap
logfx = .graphics.fromimage(lobitmap)


* create a rectangle for the linear gradient brush
lorect = .rectangle.new(0,0,12,18)

* create a linear gradient brush
logradbrush = .drawing2d.lineargradientbrush.new(lorect,;
.color.fromrgb(lnrgbstartgradclr), .color.fromrgb(lnrgbendgradclr),1)


* fill the polygon with gradient brush
logfx.fillrectangle(logradbrush, 3, 1, 12, 17)


* save the image
lobitmap.save("c:\on_smallbutton.png", .imaging.imageformat.png)
endwith


Again, let's wait for Bernard's next appearances !

2006-08-10

New VFP-X GDI+ classes

In the last weeks I've been doing some extensive tests and creating some examples using the new VFP-X GdiplusX library. These classes are terrific, completely insane. this library is already making my life with gdi+ a lot easier.

The more I use it, the more I like it. I'm really having fun.

As Craig Boyd said in one of his blog posts: "the GdiplusX library is a pure Visual FoxPro reproduction of the drawing related namespaces in .NET. We've coded well over 40,000 lines of vfp code and the library consists of 80+ classes now. at nearly 95% complete. It is safe to say that no other library on the planet gives visual foxpro developers the functionality and power that this one does when working with gdi+. " - That's totally true.


If you're planning to start a new project and will need to use GDI+, or are interested to help in the project, coding, testing making suggestions, I strongly recommend to enter the codeplex vfp-x page, select the "releases" tab, and download the most recent stable version available.

Start running the file demo.prg in the samples folder, and you'll have a good idea of the power of the class.

By the way, the VFP-X project now has a new logo too !

From now on, I'll use this space to show some examples using these classes. You may use the comments space of this blog to make this kind of requests.


Code samples

My first sample comes to attend Bernard Bout, to create an image to be used in his "blueglass" example. You can obtain more information at this link: http://weblogs.foxite.com/bernardbout/archive/2006/06/15/1838.aspx

Create a 2x2 pixel image, with a blue background and a magenta pixel at (0,0)

Here's the code:

** creates an image to be used in the "blueglass" example 
** from Bernard Bout 
** 2x2 pixel image, with blue background and a magenta pixel at (0,0)        

LOCAL lnRgbBackgClr, lnRgbPointClr
DO LOCFILE("System.app")

* define the colors to be used 
m.lnRgbPointClr = RGB(0,0,255) && blue
m.lnRgbBackgClr = RGB(255,0,255) && magenta

WITH _SCREEN.SYSTEM.Drawing
    LOCAL loBitmap AS xfcBitmap
    LOCAL loColor AS xfcColor
    LOCAL loGfx AS xfcGraphics

    * create a new 2x2 bitmap in the default pixelformat - 32bppargb 
    m.loBitmap = .BITMAP.New(2,2)

    * create a graphics object to be able to use the clear function, 
    * that will fill all the bitmap with the desired color. 
    * for this case that is not fundamental, because the bitmap is 
    * small, so we could calls "setpixel" 4 times to cover the bitmap. 
    m.loGfx = .Graphics.FromImage(m.loBitmap)
    m.loGfx.CLEAR(.COLOR.fromrgb(m.lnRgbBackgClr))

    * draw the pixel 
    m.loBitmap.setpixel(0,0, .COLOR.fromrgb(m.lnRgbPointClr))

    * save the image as png 
    m.loBitmap.SAVE("c:\blueglass.png", .Imaging.ImageFormat.Png)
ENDWITH


And here's the image created in a bigger size.


2006-07-11

GRADIENT COMMAND BUTTONS WITH GDI+

This is a deprecated post. Please search in this blog for the next posts, for the improved gradient objects and background classes.


Using some of the techniques presented in my previous posts, (read gradient backgrounds in your forms with gdi+), I've created a very simple subclass of the commandbutton object, in order to create gradient background effects.

Please take note that this is an unfinished class, not to be used in production. I'm posting it here at this moment to show to people that we can obtain very cool effects using gdi+.

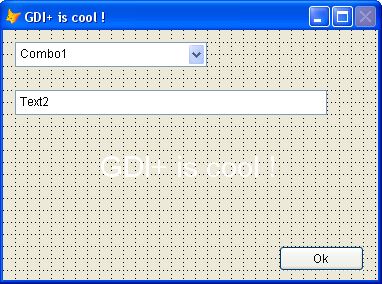
This is how the form looks in development mode:

1000.107.1970.GradDev


Below you can see the form running, when gdi+ creates the backgrounds.

1000.107.1971.GradRun


properties that you need to fill to have the desired results:

caption, fontbold, fontunderline, fontitalic, fontstrikethru

picture,

backcolor (with the main color to be used as background)

gradientmode (0 = no gradient 1 = vertical-default 2 = horizontal 3 = diagonal1 4 = diagonal2)


how the class was created:

I used the commandbutton base class, to make it have the most common usage and understanding possible, making the development mode the most seemed to the result obtained when running the form.

In the init event of the class, it verifies the gradient direction, and creates a lineargradient brush, using the color defined in the backcolor property of the object. The second color was set to white as default. Then it draws a rectangle using this brush in a picture just created, that has the same dimensions of the commandbutton.

The next step is to check if there is a picture assigned to the button; if yes, draw it to the left side, centered in the vertical.

If the caption property was set, then draw the string, centered in horizontal and vertical.

In this example i'm only using gifs with transparent background, so that the background is preserved..


the codes

The main code stays in the init event of the commandbutton subclass:

with this

local lcgradfile, lngradmode, lngradpixels, x1, y1, x2, y2, lnwidth, lnheight
lngradmode = .gradientmode
if lngradmode = 0
return && no gradient background !
endif

lcgradfile = addbs(sys(2023))+sys(2015)+".bmp"
.ctempgradfile = lcgradfile

local lcpicture, lccaption, lnrgbcolor1
lcpicture = .picture
lccaption = .caption
lnrgbcolor1 = .backcolor

lnwidth = .width
lnheight = .height

do case
case
lngradmode = 1 && vertical
y1 = 0
x2 = 1
y2 = lnheight
case lngradmode = 2 && horizontal
y1 = 0
x2 = lnwidth
y2 = 1
case lngradmode = 3 && diagonal topleft -> bottomright
y1 = 0
x2 = lnwidth
y2 = lnheight
case lngradmode = 4 && diagonal bottomleft -> topright
y1 = lnheight
x2 = lnwidth
y2 = 0
endcase

* create gradient image
set classlib to home() + "ffc/_gdiplus.vcx" additive

* create a colorobject and store argb color values to variables
local loclr as gpcolor of home() + "ffc/_gdiplus.vcx"
local lncolor1, lncolor2
loclr = createobject("gpcolor")
loclr.foxrgb = lnrgbcolor1
lncolor1 = loclr.argb
loclr.foxrgb = rgb(255,255,255) && white
lncolor2 = loclr.argb

* create a bitmap
local lobmp as gpbitmap of home() + "ffc/_gdiplus.vcx"
lobmp = createobject("gpbitmap")
lobmp.create(.width, .height)

* get a bitmab graphics object
local logfx as gpgraphics of home() + "ffc/_gdiplus.vcx"
logfx = createobject("gpgraphics")
logfx.createfromimage(lobmp)

* declare api
declare long gdipcreatelinebrushi in gdiplus.dll ;
string point1, string point2, ;
long color1, long color2, ;
long wrapmode, long @linegradient

* get a gradient brush
local lobrush as gpbrush of home() + "ffc/_gdiplus.vcx"
local hbrush && brush handle
hbrush = 0
gdipcreatelinebrushi(bintoc(0,"4rs") + bintoc(y1,"4rs"), ;
bintoc(x2,"4rs") + bintoc(y2,"4rs"), ;
lncolor1, lncolor2, 0, @hbrush)

lobrush = createobject("gpbrush")
lobrush.sethandle(hbrush, .t.)

* fill the bitmap with our gradient
logfx.fillrectangle(lobrush,0,0,.width, .height)

* draw the desired picture
if not empty(lcpicture)
local lopict as gpimage of home() + "ffc/_gdiplus.vcx"
lopict = createobject("gpimage")
lopict.createfromfile(lcpicture)

x1 = 1
y1 = (.height - lopict.imageheight) / 2
logfx.drawimageat(lopict,x1, y1)
endif

* draw the caption
#define fontstyleregular 0
#define fontstylebold 1
#define fontstyleitalic 2
#define fontstyleunderline 4
#define fontstylestrikeout 8

#define unitworld 0
#define unitdisplay 1
#define unitpixel 2
#define unitpoint 3
#define unitinch 4
#define unitdocument 5
#define unitmillimeter 6

if not empty(.caption)
local lnfontstyle
lnfontstyle = fontstyleregular + ;
iif(.fontbold, fontstylebold, 0) +;
iif(.fontitalic, fontstyleitalic, 0) +;
iif(.fontunderline, fontstyleunderline, 0) +;
iif(.fontstrikethru, fontstylestrikeout, 0)

local lofont as gpfont of home() + "ffc/_gdiplus.vcx"
lofont = newobject('gpfont', home() + 'ffc/_gdiplus.vcx')
lofont.create( .fontname ; && font name
, .fontsize ; && size in units below
, lnfontstyle ; && fontstyle
, unitpoint ) && units

* create solidbrush with the forecolor
local losolidbrush as gpsolidbrush of home() + "ffc/_gdiplus.vcx"
losolidbrush = newobject('gpsolidbrush', home() + 'ffc/_gdiplus.vcx','',0)

loclr.foxrgb = .forecolor
losolidbrush.brushcolor = loclr

* measure the height of the caption to calculate vertical position
local lostringsize as gpsize of home() + 'ffc/_gdiplus.vcx'
lostringsize = logfx.measurestringa(.caption, lofont)

lnpictwidth = iif(empty(lcpicture), 0,lopict.imagewidth)
x1 = lnpictwidth + ((.width - lnpictwidth - 1) - lostringsize.w) / 2
y1 = (.height - lostringsize.h) / 2

* create pointf with the position of caption
lctextpoint = bintoc(x1,'f') + bintoc(y1,'f')
logfx.drawstringa(.caption, lofont, lctextpoint, , losolidbrush)
endif

* save image to file
lobmp.savetofile(lcgradfile,"image/bmp")

.picture = lcgradfile

endwith
return


In destroy event, we just delete the temporary image created

if this.gradientmode = 0
return && no gradient background !
endif

with this
if file
(.ctempgradfile)
clear resources (.ctempgradfile)
erase (.ctempgradfile)
endif
endwith


to be improved:

- pictureposition - at this moment, it will always work as "1 - left of caption, centered relative to caption". vfp9 brings 14 position options, this can be done easily in a future version.

- add another property to receive the 2nd color ( at this moment, white - rgb(255,255,255) is default)

- permit to create 3 color gradients, allowing for example: blue - white - blue

- to deal with a disabled commandbuttons. please send suggestions / or pictures showing how the control should look when disabled !

- permit to receive any image, and create the transparency of the backgrounds.


The icons that i used to create this example were taken from http://www.iconbazaar.com , where you can find many cool gifs


07/19/2006 - updated version of the class

I've received many suggestions, and created a new version of the class, adding many other features.

You can download the most recent version of the class and some forms using it from this link :
http://weblogs.foxite.com/files/vfpimaging/gradobjects/gradobjects.zip

When running the form "testgradbuttons", please pass the mouse over the buttons and also click the "disable" button.

2006-06-22

Gradient Backgrounds in your forms with GDI+ Part2

In my previous post with the same title, I showed how to create vertical gradient backgrounds in forms. as commented by Malcolm Greene, that same technique can be used to VFP containers.

According to MSDN, "the lineargradientbrush class defines a brush that paints a color gradient in which the color changes evenly from the starting boundary line of the linear gradient brush to the ending boundary line of the linear gradient brush. the boundary lines of a linear gradient brush are two parallel straight lines. The color gradient is perpendicular to the boundary lines of the linear gradient brush, changing gradually across the stroke from the starting boundary line to the ending boundary line. The color gradient has one color at the starting boundary line and another color at the ending boundary line."

The main parameters to be passed to the LinearGradientBrush are:

  • point1 - starting point of the gradient. the starting boundary line passes through the starting point.
  • point2 - ending point of the gradient. the ending boundary line passes through the ending point.
  • color1 - ARGB color at the starting boundary line of this linear gradient brush.
  • color2 - ARGB color at the ending boundary line of this linear gradient brush.

In that case, I created a one pixel wide image, with the form height. then I created a linear gradientbrush, using coordinate (0,0) as point1, coordinate (0,thisform.height) as point2. Color1 was the ARGB of any selected color, and color2 was white(RGB(255,255,255)). Inside this narrow image, I have drawn a rectangle using the lineargradientbrush, and saved in bmp format. VFP's image object was responsible to "stretch" this narrow image to fit the width of the form. That technique permitted to have a small image file.


Gdi+ provides horizontal, vertical, and diagonal linear gradients too ! So, using the same techniques, we can easily create other cool effects. 

horizontal gradients

For horizontal, we need to pass as point1 and point2 two coordinates with the same "y". It is fundamental that the two points have the same second coordinate (y) to make the line connecting them horizontal.


diagonal gradients

For diagonal gradients, the two coordinates must create a diagonal line, like point (0,0) and point (50,50). This will create a diagonal line between those two points, starting from the top-left till the bottom-right edge of the form, like in the form below:


If we change the coordinates to coordinates (0,50) and (50,0), the diagonal line will end in the top edge of the form:


So, in our case, I just did this modification in the original code from the previous post:

LOCAL lnGradMode, lnGradPixels, lnHeight, lnWidth
m.lnGradPixels = 100 && width of the gradient line
m.lnGradMode = 4 && ranges from 1 to 4
DO CASE
    CASE m.lnGradMode = 1 && vertical
        x1 = 0
        y1 = 0
        x2 = 1
        y2 = m.lnGradPixels
    CASE m.lnGradMode = 2 && horizontal
        x1 = 0
        y1 = 0
        x2 = m.lnGradPixels
        y2 = 1
    CASE m.lnGradMode = 3 && diagonal topleft –> bottomright
        x1 = 0
        y1 = 0
        x2 = m.lnGradPixels
        y2 = m.lnGradPixels
    CASE m.lnGradMode = 4 && diagonal bottomleft –> topright
        x1 = 0
        y1 = m.lnGradPixels
        x2 = m.lnGradPixels
        y2 = 0
ENDCASE

m.lnWidth = IIF(m.lnGradMode = 1, 1, m.lnGradPixels)
m.lnHeight = IIF(m.lnGradMode = 2, 1, m.lnGradPixels)

The lineargradientbrush will be created using the coordinates (x1,y1) and (x2,y2). The image will have the size lnwidth, lnheight. The variable lngradpixels means the size in pixels of the image to be created. In the previous post, i used "thisform.height". After some tests, I've seen that using 60 pixels will create a good quality gradient to be expanded by the image object to fit the whole form.

So, create any form, and add the following codes to load and destroy events. change the value of the variable lngradmode to any value between 1 and 4, to see the form drawn with 4 types of gradients. also change lnGradPixels to 5, 20, and 60. don't forget to resize the form.


load event

* LOAD EVENT
LOCAL lcGradFile, lnGradMode, lnGradPixels, x1, y1, x2, y2, lnWidth, lnHeight
m.lcGradFile = ADDBS(SYS(2023)) + SYS(2015) + ".bmp"
THIS.ADDPROPERTY("cTempGradFile", m.lcGradFile)

m.lnGradPixels = 60
m.lnGradMode = 4
DO CASE
    CASE m.lnGradMode = 1 && vertical
        m.x1 = 0
        m.y1 = 0
        m.x2 = 1
        m.y2 = m.lnGradPixels

    CASE m.lnGradMode = 2 && horizontal
        m.x1 = 0
        m.y1 = 0
        m.x2 = m.lnGradPixels
        m.y2 = 1

    CASE m.lnGradMode = 3 && diagonal topleft –> bottomright
        m.x1 = 0
        m.y1 = 0
        m.x2 = m.lnGradPixels
        m.y2 = m.lnGradPixels

    CASE m.lnGradMode = 4 && diagonal bottomleft –> topright
        m.x1 = 0
        m.y1 = m.lnGradPixels
        m.x2 = m.lnGradPixels
        m.y2 = 0

ENDCASE

m.lnWidth = IIF(m.lnGradMode = 1, 1, m.lnGradPixels)
m.lnHeight = IIF(m.lnGradMode = 2, 1, m.lnGradPixels)

IF FILE(m.lcGradFile)
    CLEAR RESOURCES (m.lcGradFile)
ENDIF

LOCAL lnRgbColor1
m.lnRgbColor1 = RGB(0,128,255) && blue

* create gradient image 
SET CLASSLIB TO HOME() + "ffc/_gdiplus.vcx" ADDITIVE

* create a colorobject and store argb color values to variables 
LOCAL loClr AS gpColor OF HOME() + "ffc/_gdiplus.vcx"
LOCAL lnColor1, lnColor2
m.loClr = CREATEOBJECT("gpcolor")
m.loClr.FoxRgb = m.lnRgbColor1
m.lnColor1 = m.loClr.argb
m.loClr.FoxRgb = RGB(255,255,255) && white
m.lnColor2 = m.loClr.argb

* create a bitmap 
LOCAL loBmp AS gpBitmap OF HOME() + "ffc/_gdiplus.vcx"
m.loBmp = CREATEOBJECT("gpbitmap")
m.loBmp.CREATE(m.lnWidth, m.lnHeight)

* get a bitmab graphics object 
LOCAL loGfx AS gpGraphics OF HOME() + "ffc/_gdiplus.vcx"
m.loGfx = CREATEOBJECT("gpgraphics")
m.loGfx.CreateFromImage(m.loBmp)

* declare api 
DECLARE LONG gdipcreatelinebrushi IN GDIPLUS.DLL ;
    STRING point1, STRING point2, ;
    LONG color1, LONG color2, ;
    LONG wrapmode, LONG @linegradient

* get a gradient brush 
LOCAL loBrush AS gpBrush OF HOME() + "ffc/_gdiplus.vcx"
LOCAL hBrush && brush handle
m.hBrush = 0
= gdipCreateLinebrushI(BINTOC(m.x1,"4rs") + BINTOC(m.y1,"4rs"), ;
      BINTOC(m.x2,"4rs") + BINTOC(m.y2,"4rs"), ;
      m.lnColor1, m.lnColor2, 0, @m.hBrush)
m.loBrush = CREATEOBJECT("gpbrush")
m.loBrush.sethandle(m.hBrush, .T.)

* fill the bitmap with our gradient 
m.loGfx.FillRectangle(m.loBrush,0,0,m.lnWidth, m.lnHeight)
m.loBmp.SaveToFile(m.lcGradFile,"image/bmp")

THISFORM.ADDOBJECT("imgbackground","image")
WITH THISFORM.imgbackground
    .STRETCH = 2 && stretch
    .WIDTH = THISFORM.WIDTH
    .HEIGHT = THISFORM.HEIGHT
    .ANCHOR = 15 && resize width and height

    .PICTURE = m.lcGradFile
    * .pictureval = filetostr(lcgradfile) 
    * .pictureval = loadpicture(lcgradfile) 
    * erase (lcgradfile)

    .ZORDER(1)
    .VISIBLE = .T.
ENDWITH

RETURN


destroy event

*DESTROY EVENT
WITH THISFORM
    IF FILE(.cTempGradFile)
        CLEAR RESOURCES (.cTempGradFile)
        ERASE (.cTempGradFile)
    ENDIF
ENDWITH

A slight modification was the addiction of the zorder(1), to make sure the image object added is the first one, and staying in the back of all objects of the form. Thanks Aílsom !

Thanks to Malcolm Greene, the codes from resize event were removed, and substituted with .anchor = 15 && resize width and height. VFP9 brought so many cool features, and I must admit that i've tested just a few of them till this moment.

Malcolm also suggested sending the binaries from the image created to the pictureval property of the image object. I don't know why, but in some machines the picture appeared rotated in a 90 degree. Also, in Windows NT, the white part of the gradient was replaced with transparency. So, for this moment, I'm keeping the codes at the destroy event to make sure the image created is deleted from the disk.

I'm sure that there is a good solution for that, maybe someone can explain that to me ?


New Gdi+ classes

Craig and Bo added to the new library apart from all the GDI+ functions, some other classes, that will make the use of GDI+ really easy and, most important, very intuitive. There will be no more need to make direct API calls to Gdi+, manage object handles. The creation of images will become really intuitive.

One of the main addictions is the imagecanvas class. That's a subclass of the image native class, that was created to receive the drawn image. the advantage to use this class is that it renders graphics super fast (according to Bo and Craig about up to 30 times faster than saving an image to disk and loading to an image object). There will be no disk access, once all the image is manipulated directly from the memory. The user will have only to put the codes to draw the image in the "BeforeDraw" method of the object and that's all.

In the case of gradient backgrounds of forms, we will have just to add the "imagecanvas" object, and in the beforedraw method of this object put this code. only 5 lines!!! Thanks to Craig Boyd for sending this sample to me.


beforedraw event

* Using GdiPlusX and the ImageCanvas
* Place this code at the "BeforeDraw" event of the ImageCanvas class
LOCAL loBrush AS xfcLinearGradientBrush
WITH _SCREEN.SYSTEM.Drawing
    m.loBrush = .Drawing2d.LinearGradientBrush.New(THIS.Rectangle,;
          .COLOR.FromRgb(0,128,255), .COLOR.White,;
          .Drawing2d.LinearGradientMode.ForwardDiagonal)
    THIS.oGfx.FillRectangle(m.loBrush, THIS.Rectangle)
ENDWITH


How do you fill using these classes ?

There are many more cool effects to create with lineargradientbrushes. By default, the color in a linear gradient changes uniformly. However, it is possible to customize a linear gradient so that the color changes in a non-uniform fashion, creating gradients using more than two colors.

From now on, I'll try to show these features using the new classes. I must confess that I don't feel smart to code in the way that I just presented in this post when I can replace more than 70 lines of code with 5 !

In the attached file I'm sending 2 forms. The first, gradient.scx creates a simple form, with codes in load and destroy events. Try also the form gradient2.scx, that will permit you to customize the gradient colors and directions on the fly.


2006-06-16

GDIPLUS FOR ALL VFP VERSIONS

As we all know, gdiplus.dll brings many new possibilities to vfp users.
Gdiplus.dll is a free and redistributable library provided by microsoft, that must be used only in windows (R) systems.

Alexander Golovlev may have been the first person to publish a class that dealed with this fantastic library. He created the class GPIMAGE.PRG, that was published in 2003 in the UniversalThread / LevelExtreme downloads area.

https://www.levelextreme.com/Home/ShowHeader?Activator=17&ID=18584

GpImage came a long time before VFP9, and is supposed to work with VFP7 and above. Probably works with previous versions, but i've not tested. It's a great library, providing a wrapper class to deal with Gdi+. The original class works with the image class, and has most functions that the gpimage class from _GdiPlus.vcx (from the VFP9 FFC) brings, and some other really interesting, providing windows captures, cropping images and some other cool functions.

Under the authorization of Alexander Golovlev, and with his help and support, I added some functions to the original GpImage class published in UT.

Basically we included a graphics class.
New methods included let you draw rectangles, lines, ellipsis, pies, strings and pictures on images. brings the possibility to control alignment, size, orientation, rotation, of any shape, text or picture.
It is possible to work with image attributes too, changing colors of images, like convert to B&W or gray scale, increase a color, etc.

This class is based on GDI+ and requires gdiplus.dll which is freely available and can be installed on win98 and higher. If you have not installed WinXP or .NET runtime then you can download this dll from
http://www.microsoft.com/downloads/details.aspx?familyid=6a63ab9c-df12-4d41-933c-be590feaa05a&displaylang=en

The link for the enhanced class gpimage that deals with gdiplus.dll is :
http://vfpimaging.blogspot.com/p/gpimage2.html

There you can find also a FAQS link, with many samples using the class.
Download, open the examples folder, where you can find many small prgs and forms dealing with the class.

There is a cool example of a form that changes contrast, saturation, brightness (testgpimage.scx), another usage of a pie charts class (objpie.prg), and also printing vertical or upside down texts in vfp reports (see testefrx.prg and teste.frx).

The class is more recommended for people that still have not upgraded to VFP9 and need to use GDI+. It's a long time since I don't send an update to this class.
There are many other new features that can be added to the library, like getting metadata information, gradient color brushes, etc.

Recently, I've been using my free time to develop using the new _Gdiplus.vcx class and the fantastic new VFPX classes - aka GDIPLUSX.
http://vfpimaging.blogspot.com/p/gpimage2.html

2006-06-13

Gradient Backgrounds in your forms with GDI+

After reading this post, read also: Gradient backgrounds in your forms with gdi+ part 2


Gdi+ brings us the possibility to create many cool effects such as gradient colors. This feature was not included in _gdiplus.vcx, but can also be accessed easily with a simple call to the flat API. A great part of the codes below that are related to the creation of the gradient brush is from Bo Durban.

To apply this to forms is really easy. add the codes below to the load, resize and destroy events of any form:


load event

LOCAL lcGradFile
m.lcGradFile = ADDBS(SYS(2023)) + SYS(2015) + ".bmp"
THIS.ADDPROPERTY("cTempGradFile", m.lcGradFile)

IF FILE(m.lcGradFile)
    CLEAR RESOURCES (m.lcGradFile)
ENDIF

LOCAL lnRgbColor1
m.lnRgbColor1 = RGB(60,30,180) && blue

* create gradient image 
SET CLASSLIB TO HOME() + "ffc/_gdiplus.vcx" ADDITIVE

* declare API 
DECLARE LONG gdipCreateLinebrushI IN GDIPLUS.DLL ;
    STRING point1, STRING point2, ;
    LONG color1, LONG color2, ;
    LONG wrapmode, LONG @linegradient

* create a colorobject and store argb color values to variables 
LOCAL loClr AS gpColor OF HOME() + "ffc/_gdiplus.vcx"
LOCAL lnColor1, lnColor2
m.loClr = CREATEOBJECT("gpcolor")
m.loClr.FoxRgb = m.lnRgbColor1
m.lnColor1 = m.loClr.ARGB
m.loClr.FoxRgb = RGB(255,255,255) && white
m.lnColor2 = m.loClr.ARGB

* create a bitmap 
LOCAL loBmp AS gpBitmap OF HOME() + "ffc/_gdiplus.vcx"
m.loBmp = CREATEOBJECT("gpbitmap")
m.loBmp.CREATE(1,THISFORM.HEIGHT)

* get a bitmap graphics object 
LOCAL loGfx AS gpGraphics OF HOME() + "ffc/_gdiplus.vcx"
m.loGfx = CREATEOBJECT("gpgraphics")
m.loGfx.CreateFromImage(m.loBmp)

* get a gradient brush 
LOCAL loBrush AS gpBrush OF HOME() + "ffc/_gdiplus.vcx"
LOCAL hBrush && brush handle
m.hBrush = 0
gdipCreateLinebrushI(BINTOC(0,"4rs") + BINTOC(0,"4rs"), ;
      BINTOC(0,"4rs") + BINTOC(THISFORM.HEIGHT,"4rs"), ;
      m.lnColor1, m.lnColor2, 0, @m.hBrush)
m.loBrush = CREATEOBJECT("gpbrush")
m.loBrush.sethandle(m.hBrush, .T.)

* fill the bitmap with our gradient 
m.loGfx.FillRectangle(m.loBrush,0,0,1,THISFORM.HEIGHT)
m.loBmp.SaveToFile(m.lcGradFile,"image/bmp")

THISFORM.ADDOBJECT("imgbackground","image")
WITH THISFORM.imgbackground
    .STRETCH = 2
    .WIDTH = THISFORM.WIDTH
    .HEIGHT = THISFORM.HEIGHT
    .PICTURE = m.lcGradFile
    .VISIBLE = .T.
ENDWITH
RETURN


resize event

Thisform.imgbackground.Width = Thisform.Width 
Thisform.imgbackground.Height = Thisform.Height


destroy event

WITH THISFORM
    IF FILE(.cTempGradFile)
        CLEAR RESOURCES (.cTempGradFile)
        ERASE (.cTempGradFile)
    ENDIF
ENDWITH


New GDI+ classes

The code I presented in the Load event works pretty fine, but sounds really ugly, when comparing to what we are able to do with GdiPlusX

The code below will replace all codes related to the creation of the gradient color in the load event.

* create a GDI+ linear gradient image using GdiPlusX
DO LOCFILE("system.app")

LOCAL loBmp AS xfcBitmap
LOCAL loGfx AS xfcGraphics
LOCAL loBrush AS xfcBrush
WITH _SCREEN.SYSTEM.Drawing
    m.loBmp = .BITMAP.New(1, THISFORM.HEIGHT)
    m.loGfx = .Graphics.FromImage(m.loBmp)
    m.loBrush = .Drawing2d.LinearGradientBrush.New( ;
          .Rectangle.New(0, 0, 1, THISFORM.HEIGHT), ;
          .COLOR.FromRgb(lnRgbColor1), .COLOR.White, 1)
    m.loGfx.FillRectangle(m.loBrush, m.loBrush.Rectangle)
    m.loBmp.SAVE(lcGradFile, .Imaging.ImageFormat.bmp)
ENDWITH


Related post: Gradient backgrounds in your VFP forms with GDI+ Part 2